> ## Documentation Index
> Fetch the complete documentation index at: https://germeytechnology-docs-remove-4o-image-nav.mintlify.site/llms.txt
> Use this file to discover all available pages before exploring further.
# OpenAI Images Generations API 신청 및 사용
> OpenAI generation 集成指南 - Ace Data Cloud
OpenAI Images Generations API는 현재 다양한 이미지 생성 모델을 지원합니다. 여기에는 클래식한 `dall-e-3`, 텍스트 렌더링 능력이 더 뛰어난 `gpt-image-1`, 최신 세대인 **`gpt-image-2`**, 그리고 동일한 인터페이스로 접속 가능한 **`nano-banana` / `nano-banana-2` / `nano-banana-pro`** 시리즈 모델이 포함됩니다. 이 모델들은 모두 텍스트 설명에 따라 고품질 이미지를 생성할 수 있습니다.
이 문서는 OpenAI Images Generations API 사용 절차를 주로 소개하며, 이를 통해 OpenAI 시리즈의 이미지 생성 기능을 쉽게 활용할 수 있습니다.
## 신청 절차
OpenAI Images Generations API를 사용하려면 먼저 [OpenAI Images Generations API](https://platform.acedata.cloud/documents/openai-images-generations) 페이지에서 「Acquire」 버튼을 클릭하여 요청에 필요한 인증 정보를 획득하세요:

로그인 또는 회원가입이 되어 있지 않으면 자동으로 로그인 페이지로 이동하여 회원가입 및 로그인을 안내합니다. 로그인 후에는 자동으로 현재 페이지로 돌아옵니다.
첫 신청 시 무료 할당량이 제공되어 해당 API를 무료로 사용할 수 있습니다.
## GPT-Image-2 모델
`gpt-image-2`는 OpenAI가 출시한 차세대 이미지 생성 모델로, `dall-e-3` 및 `gpt-image-1`에 비해 다음과 같은 점에서 현저한 향상이 있습니다:
* **명령 준수 능력 강화**: 복잡한 구성, 개수, 위치 관계 등 구조화된 명령을 정확히 이해할 수 있습니다.
* **텍스트 렌더링 선명도 향상**: 포스터, 메뉴, 인포그래픽, 로고 등에서 영어 및 숫자가 거의 혼동 없이 표현됩니다.
* **풍부한 스타일 표현**: 영화 같은 인물 사진, 복고풍 포스터, 아동 일러스트, 제품 사진, 인포그래픽 등 다양한 스타일을 기본 지원합니다.
* **다양한 비율 및 고해상도 기본 지원**: 5가지 비율(1:1, 4:3, 3:4, 16:9, 9:16)과 3단계 해상도(1K / 2K / 4K)를 커버합니다.
호출 방식은 다른 모델과 완전히 동일하며, `model` 필드를 `gpt-image-2`로 설정하면 됩니다. 반환 결과의 `url`은 `platform.cdn.acedata.cloud`에 영구 호스팅된 이미지 링크로, 브라우저에서 직접 열거나 웹페이지에 삽입할 수 있습니다.
### 지원하는 `size` 값
`gpt-image-2`는 `size` 형식만 검사하며, `auto` 또는 빈 문자열이 아니면 `WIDTHxHEIGHT` 형식(예: `1024x1024`, `2048x1152`, `800x600`)이어야 합니다. 다른 형식은 400 오류를 반환합니다. **모든 크기(1K / 2K / 4K / 커스텀)는 단일 이미지당 동일 요금이 부과되며, 크기에 따른 추가 요금은 없습니다.**
상위 시스템의 커스텀 크기 제한: 너비와 높이는 16의 배수여야 하며, 긴 변 ≤ 3840, 총 픽셀 수 ≤ 8,294,400 이내여야 합니다. 초과 시 상위 시스템에서 거부되어 4xx 오류가 반환됩니다.
| 비율 | 1K 권장 | 2K 권장 | 4K 권장 |
| ---- | ----------- | ----------- | ----------- |
| 1:1 | `1024x1024` | `2048x2048` | `2880x2880` |
| 4:3 | `1536x1024` | `2048x1536` | `3264x2448` |
| 3:4 | `1024x1536` | `1536x2048` | `2448x3264` |
| 16:9 | `1792x1024` | `2048x1152` | `3840x2160` |
| 9:16 | `1024x1792` | `1152x2048` | `2160x3840` |
> `size: "auto"`를 전달하거나 **`size` 필드를 생략**할 수도 있으며, 이 경우 모델이 기본 크기를 자동으로 선택합니다.
>
> 1K 단계에서 상위 시스템 출력은 엄격한 픽셀 정렬을 보장하지 않습니다 — 예를 들어 `1024x1024`를 요청해도 `1254x1254`가 나올 수 있으며, 비율은 유지됩니다. 이를 다시 `size`로 전달해도 요금은 동일합니다.
>
> 4K 단일 호출은 보통 4\~8분이 소요되므로, 아래 `callback_url` 비동기 콜백과 함께 사용하는 것을 권장합니다.
> **`n` 파라미터 관련**
>
> `gpt-image-2`는 현재 **`n > 1`을 지원하지 않습니다**. 이 파라미터는 무시되며, `n=1`이든 `n=10`이든 단일 요청당 1장만 반환되고 1장 요금만 부과됩니다. 여러 후보 이미지를 얻으려면 **여러 번 동시 요청을 직접 실행**하세요(서로 다른 `prompt` 또는 `seed`를 함께 전달하는 것이 좋습니다. 그렇지 않으면 생성된 이미지들이 매우 유사할 수 있습니다). 이 제한은 `gpt-image-1` / `gpt-image-1.5` 및 `nano-banana` / `nano-banana-2` / `nano-banana-pro` 시리즈에도 동일하게 적용됩니다. `dall-e-2`는 현재 유일하게 `n > 1`을 기본 지원하는 모델이며, `dall-e-3`는 `n = 1`만 지원합니다.
아래는 여러 실제 예시를 통해 `gpt-image-2`의 성능을 직관적으로 확인할 수 있습니다.
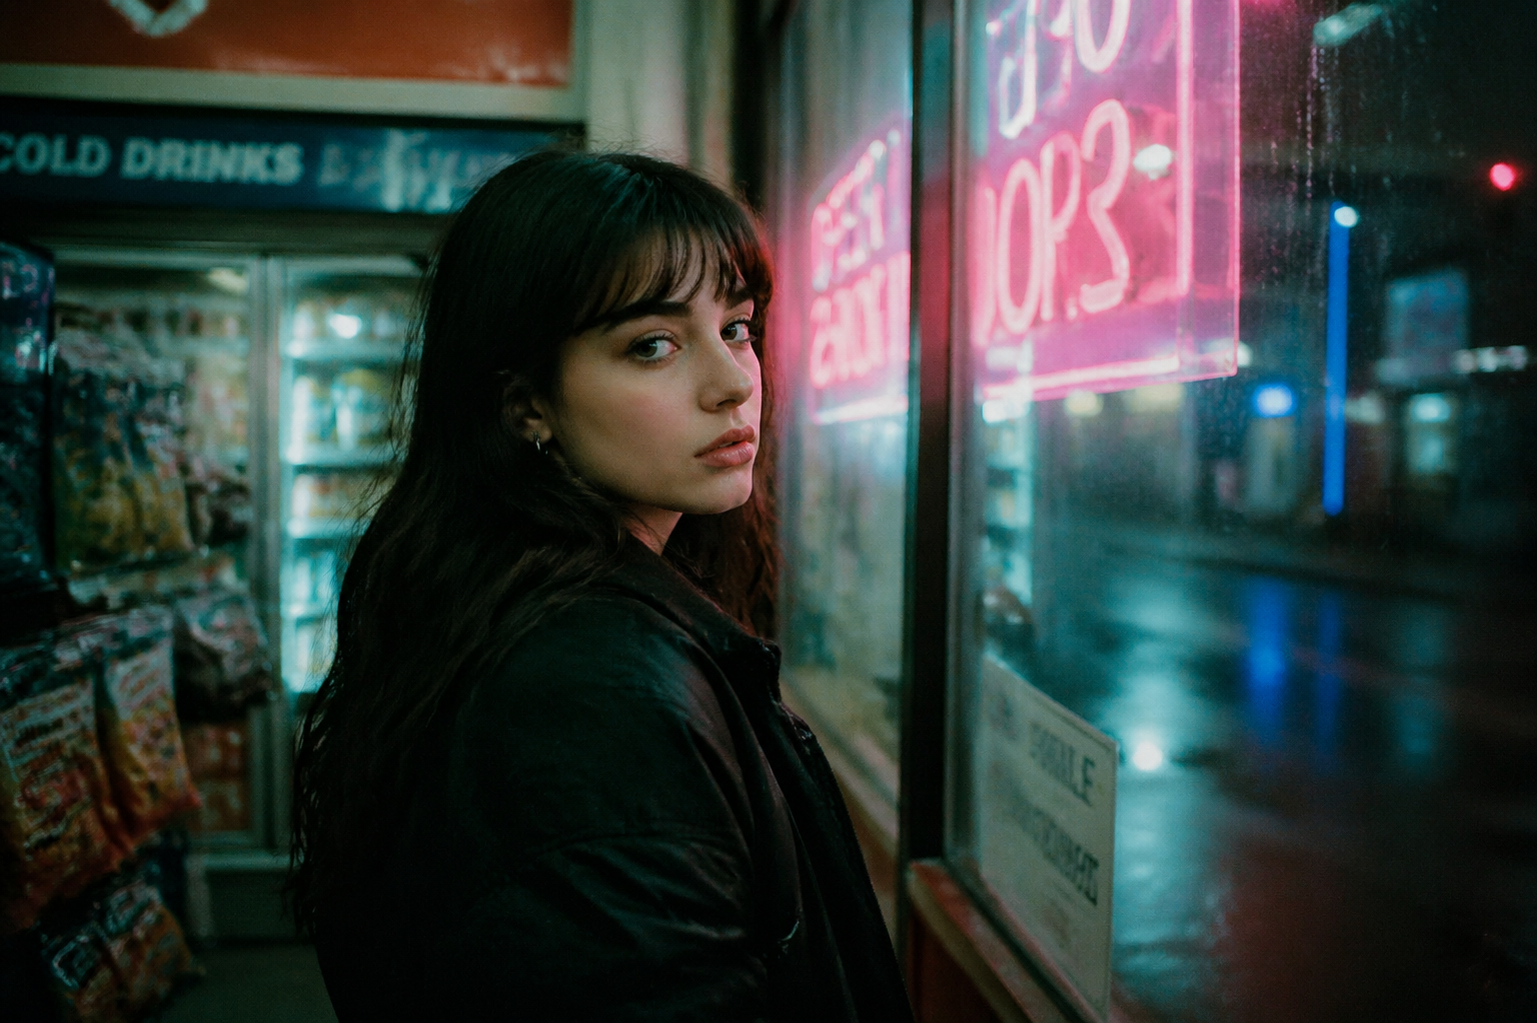
### 시나리오 1: 영화 같은 인물 사진
프롬프트에 영화 용어(35mm 필름, 얕은 피사계 심도, 네온 조명 등)를 사용하여 분위기와 질감을 정밀하게 제어할 수 있습니다.
Python 샘플 호출 코드:
```python theme={null}
import requests
url = "https://api.acedata.cloud/openai/images/generations"
headers = {
"accept": "application/json",
"authorization": "Bearer {token}",
"content-type": "application/json"
}
payload = {
"model": "gpt-image-2",
"prompt": "A cinematic portrait of a young woman standing in a convenience store at night, illuminated by soft pink and cyan neon signs through the window. Shot on 35mm film, shallow depth of field, slight grain, melancholic mood.",
"size": "1024x1536"
}
response = requests.post(url, json=payload, headers=headers)
print(response.text)
```
반환 결과 예시:
```json theme={null}
{
"success": true,
"task_id": "ab58a5df-6f46-4874-bff6-93169e2849a3",
"created": 1777048800,
"data": [
{
"revised_prompt": "A cinematic portrait of a young woman standing in a convenience store at night, illuminated by soft pink and cyan neon signs through the window. Shot on 35mm film, shallow depth of field, slight grain, melancholic mood.",
"url": "https://platform.cdn.acedata.cloud/gpt-image/ab58a5df-6f46-4874-bff6-93169e2849a3_0.png"
}
]
}
```
생성된 이미지는 다음과 같습니다:
### 시나리오 2: 복고풍 여행 포스터 (텍스트 렌더링 포함)
`gpt-image-2`는 레이아웃 및 폰트 렌더링에서 안정적인 성능을 보여 포스터, 메뉴, 카드 등 텍스트가 포함된 디자인에 적합합니다.
```python theme={null}
payload = {
"model": "gpt-image-2",
"prompt": "A vintage travel poster of the Amalfi Coast, Italy. Stylized art-deco illustration of cliffside lemon-yellow houses cascading down to a turquoise sea, with a small white sailboat in the harbor. Bold typography at the top reads AMALFI and at the bottom ITALIA 1958. Limited color palette: cream, sea-blue, lemon yellow, terracotta. Slight paper-grain texture.",
"size": "1024x1536"
}
```
반환된 `url` 필드의 이미지:
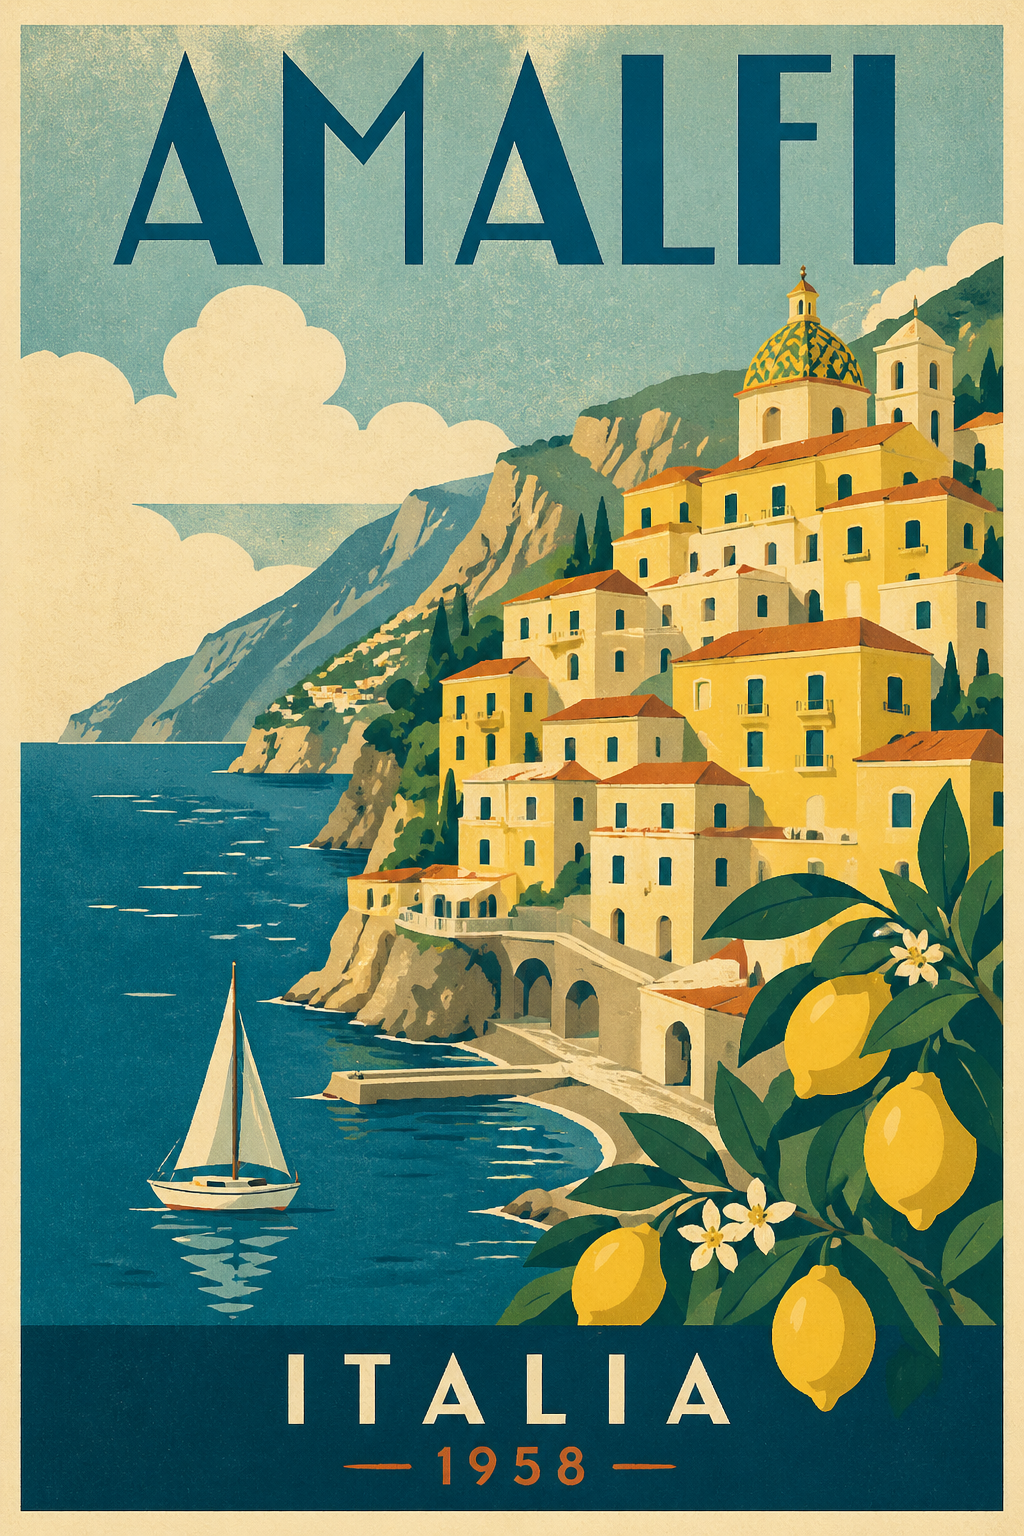
모델이 Art Deco 포스터의 시각적 스타일을 정확히 재현했으며, 제목 텍스트 `AMALFI`와 `ITALIA 1958`이 선명하고 올바르게 렌더링된 것을 확인할 수 있습니다.
### 시나리오 3: 복잡한 구성과 개수
아래 프롬프트는 모델이 "수량"과 "위치" 같은 구조화된 명령을 얼마나 잘 따르는지 테스트합니다.
```python theme={null}
payload = {
"model": "gpt-image-2",
"prompt": "A wooden bookshelf consisting of three shelves: On the top shelf, there should be one book. On the second shelf, there should be three books. On the bottom shelf, there should be seven books. Soft warm lighting, photorealistic, cozy library atmosphere.",
"size": "1024x1024"
}
```
생성된 이미지는 다음과 같습니다:
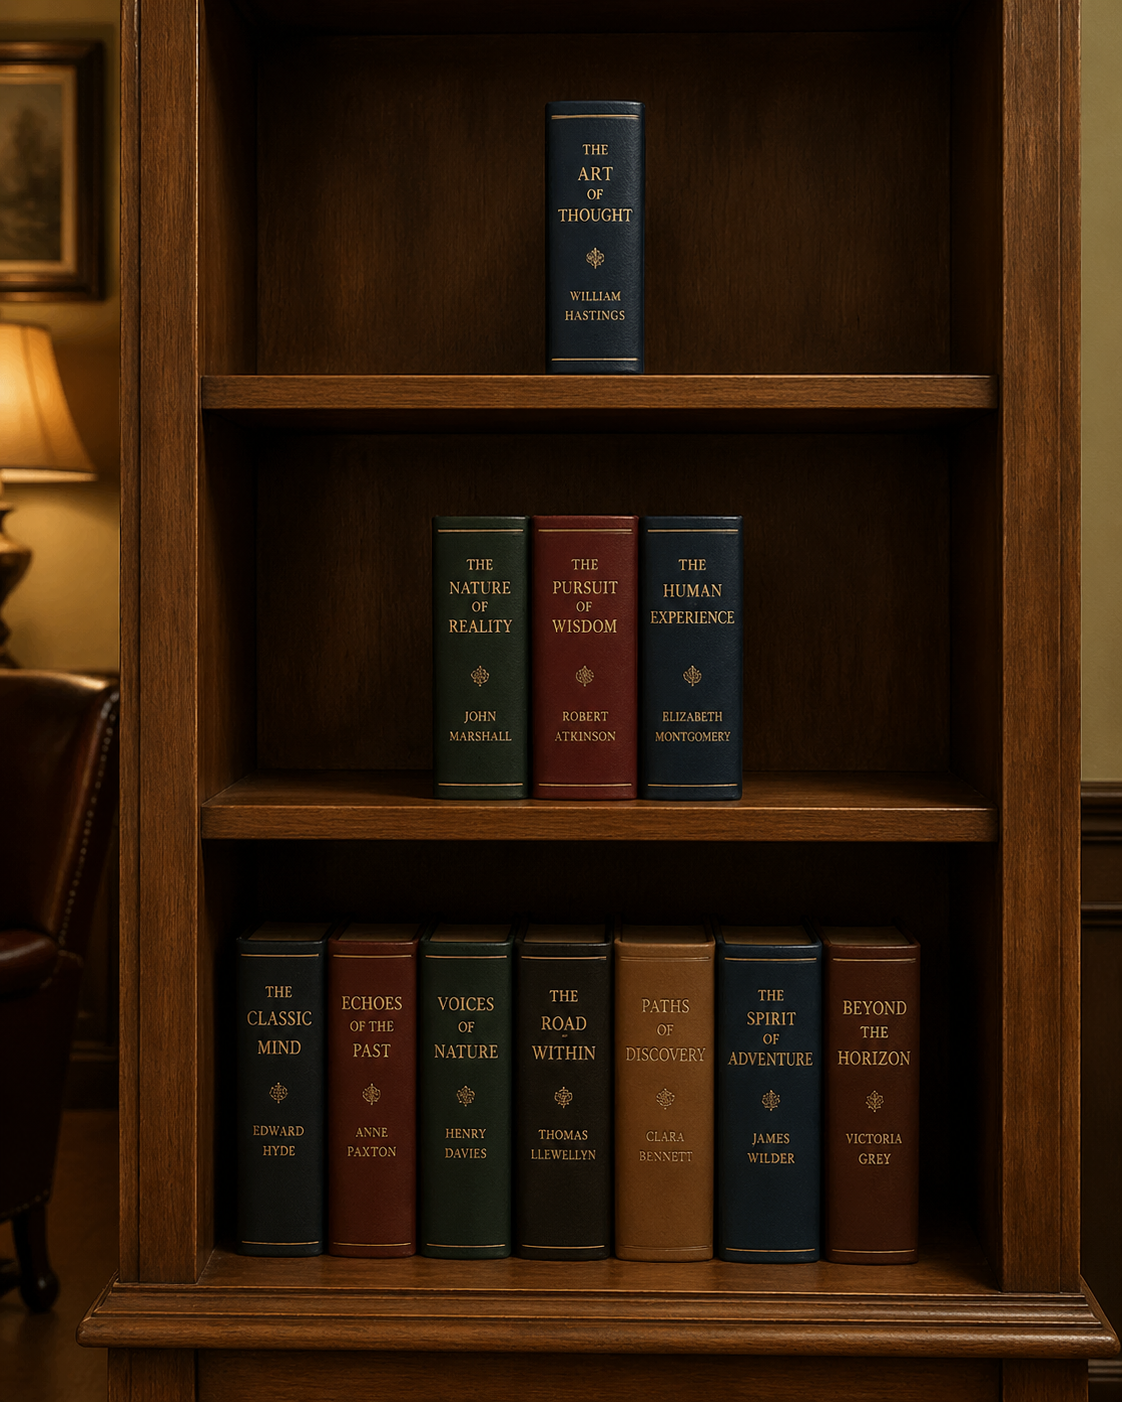
세 개의 선반에 있는 책의 개수(1 / 3 / 7)가 프롬프트와 완전히 일치하며, 이는 `dall-e-3` 시절에는 안정적으로 구현하기 어려웠던 기능입니다.
### 시나리오 4: 일러스트 스타일 (가로 화면)
예술 매체 및 분위기 키워드를 지정하여 스타일화된 일러스트를 생성할 수 있습니다.
```python theme={null}
payload = {
"model": "gpt-image-2",
"prompt": "A soft, poetic children's book illustration of a small fox reading a book under a glowing mushroom in a moonlit forest. Watercolor and pencil texture, gentle pastel colors, dreamy atmosphere, hand-drawn feel.",
"size": "1536x1024"
}
```
생성된 가로 화면 일러스트는 다음과 같습니다:

### 비동기 및 콜백
`gpt-image-2` 단일 호출은 보통 60\~90초가 소요되며, 장시간 연결을 유지하고 싶지 않은 경우 아래에서 설명하는 `callback_url` 비동기 콜백 메커니즘을 사용할 수 있습니다. 호출 절차는 다른 모델과 완전히 동일합니다.
## Nano Banana 시리즈 모델
`nano-banana` 시리즈는 Gemini 기반 이미지 생성 모델로, 동일한 `/openai/images/generations` 인터페이스를 통해 접속할 수 있어 엔드포인트 전환이 필요 없으며, `model`만 아래 표 중 하나로 변경하면 됩니다.
| 모델 | 요금 (Credits / 회) | 적용 시나리오 |
| ----------------- | ---------------- | ---------------------------- |
| `nano-banana` | 0.14 | 일반 이미지 생성, 가장 빠르고 비용이 낮음 |
| `nano-banana-2` | 0.28 | 품질 및 디테일 현저히 향상 |
| `nano-banana-pro` | 0.35 | 시리즈 플래그십, 구성, 디테일, 텍스트 모두 최상 |
> **중요: 지원 파라미터 범위**
>
> Nano Banana는 적응 계층을 통해 OpenAI 프로토콜에 접속하며, `gpt-image-*`와 비교해 다음 파라미터만 지원합니다: `model`, `prompt`, `size`.
>
> * `size`는 아래 표에 따라 내부 `aspect_ratio`로 매핑되며, 미기재 크기는 `1:1`로 축소됩니다:
> * `1024x1024` / `512x512` / `256x256` → `1:1`
> * `1792x1024` → `16:9`
> * `1024x1792` → `9:16`
> * `n`, `quality`, `style`, `response_format`, `background`, `output_format` 등 파라미터는 지원하지 않으며, 입력해도 무시됩니다.
> * 반환 구조는 OpenAI 형식을 따르나(`data[].url`), `created`는 항상 `0`이며, `b64_json`을 반환하지 않고 `revised_prompt`는 항상 원본 `prompt`와 동일합니다.
### 기본 호출
```python theme={null}
import requests
url = "https://api.acedata.cloud/openai/images/generations"
headers = {
"accept": "application/json",
"authorization": "Bearer {token}",
"content-type": "application/json"
}
payload = {
"model": "nano-banana",
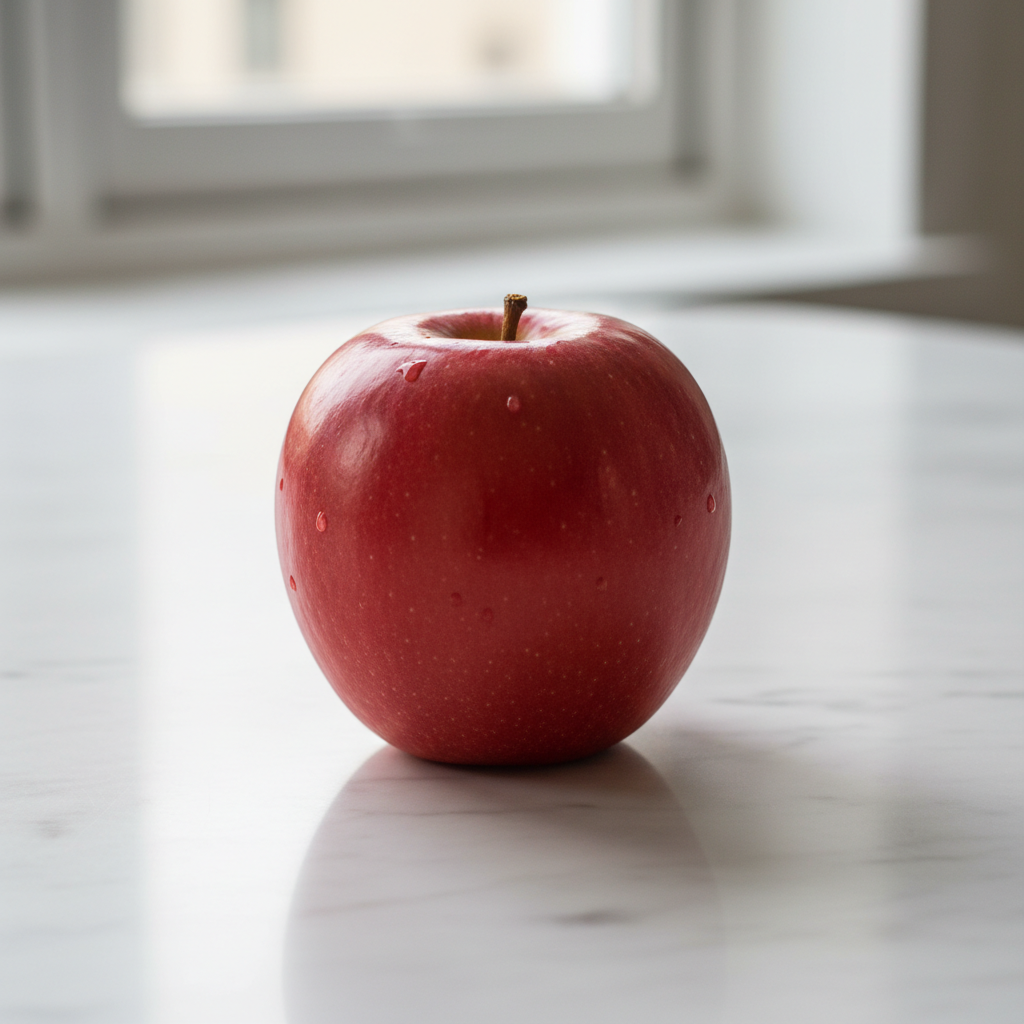
"prompt": "a small red apple on a white table, photoreal",
"size": "1024x1024"
}
response = requests.post(url, json=payload, headers=headers)
print(response.text)
```
반환 결과 예시:
```json theme={null}
{
"created": 0,
"data": [
{
"url": "https://platform.cdn.acedata.cloud/nanobanana/6870b330-65c4-436c-bb80-819fdae7a7a4.png",
"revised_prompt": "a small red apple on a white table, photoreal"
}
]
}
```
생성된 이미지는 반환된 `url` 필드를 통해 직접 접근할 수 있습니다:
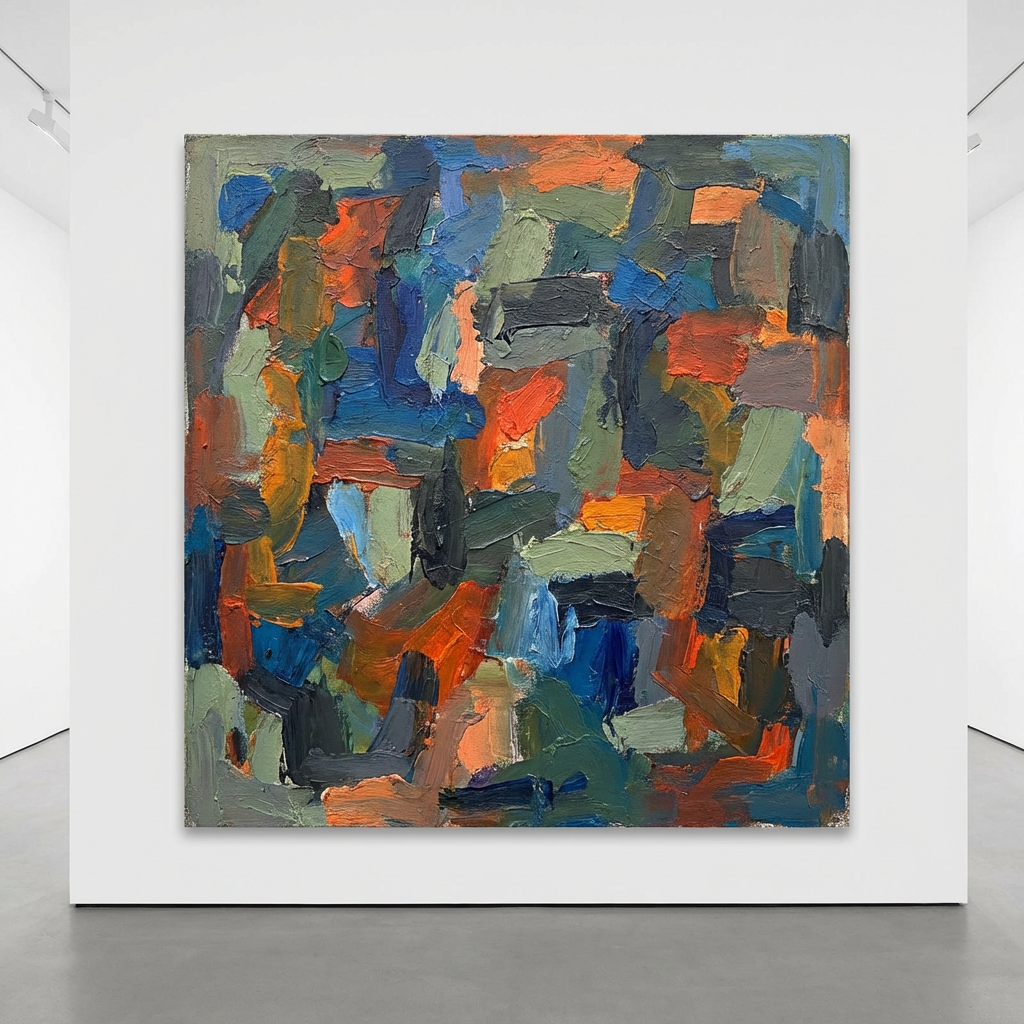
### 플래그십 모델 `nano-banana-pro`로 업그레이드
`model`만 `nano-banana-pro`로 변경하면 나머지 파라미터는 동일합니다:
```python theme={null}
payload = {
"model": "nano-banana-pro",
"prompt": "abstract painting",
"size": "1024x1024"
}
```
반환 예시:
```json theme={null}
{
"created": 0,
"data": [
{
"url": "https://platform.cdn.acedata.cloud/nanobanana/6227fcc9-3442-4aa3-a76c-4a4441a99649.png",
"revised_prompt": "abstract painting"
}
]
}
```
### 비동기 콜백
`callback_url` 비동기 콜백 메커니즘은 nano-banana에도 동일하게 적용되며, 호출 절차는 다른 모델과 완전히 동일합니다. 자세한 내용은 아래 [비동기 콜백](#비동기-콜백) 섹션을 참고하세요.
## 기본 사용법
이제 인터페이스에서 해당 내용을 입력할 수 있습니다. 아래 그림과 같습니다:
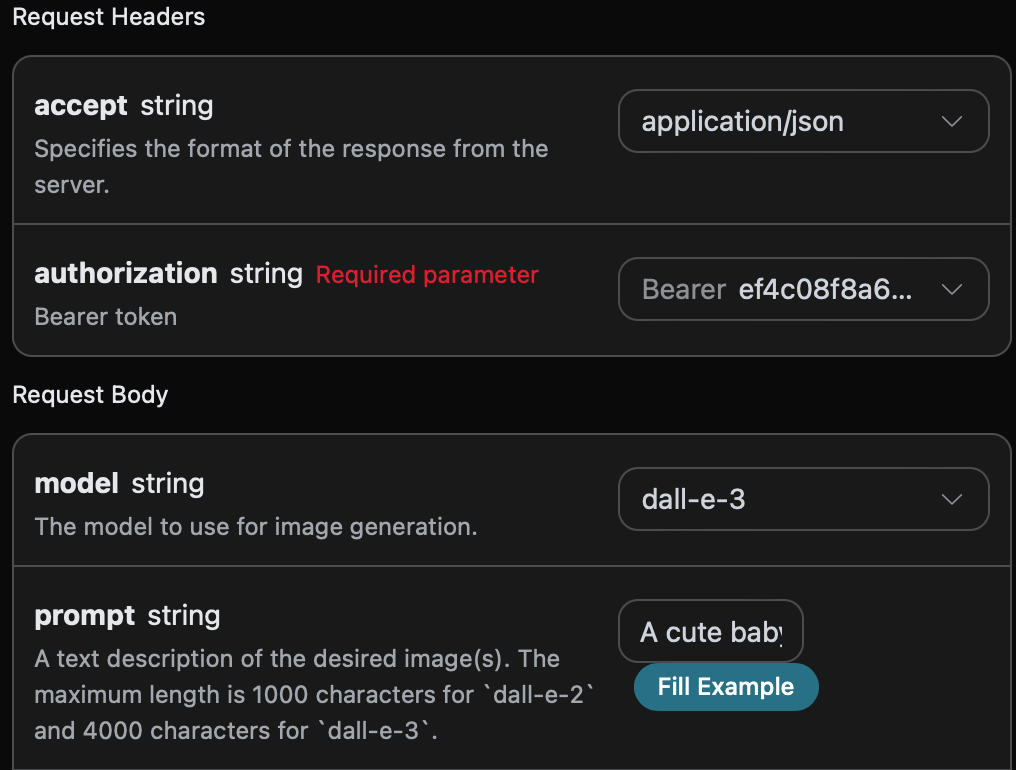
처음 이 인터페이스를 사용할 때는 최소 세 가지 내용을 입력해야 합니다. 하나는 `authorization`으로, 드롭다운 목록에서 선택할 수 있습니다. 또 다른 파라미터는 `model`로, OpenAI DALL-E 공식 모델 카테고리를 선택하는 것입니다. 여기서는 주로 1종류 모델이 제공되며, 자세한 내용은 제공된 모델 정보를 참고하세요. 마지막 파라미터는 `prompt`로, 생성할 이미지에 대한 텍스트 설명입니다.
오른쪽에는 호출 코드가 자동 생성되어 있어 복사해 바로 실행하거나 「Try」 버튼을 클릭해 테스트할 수 있습니다.
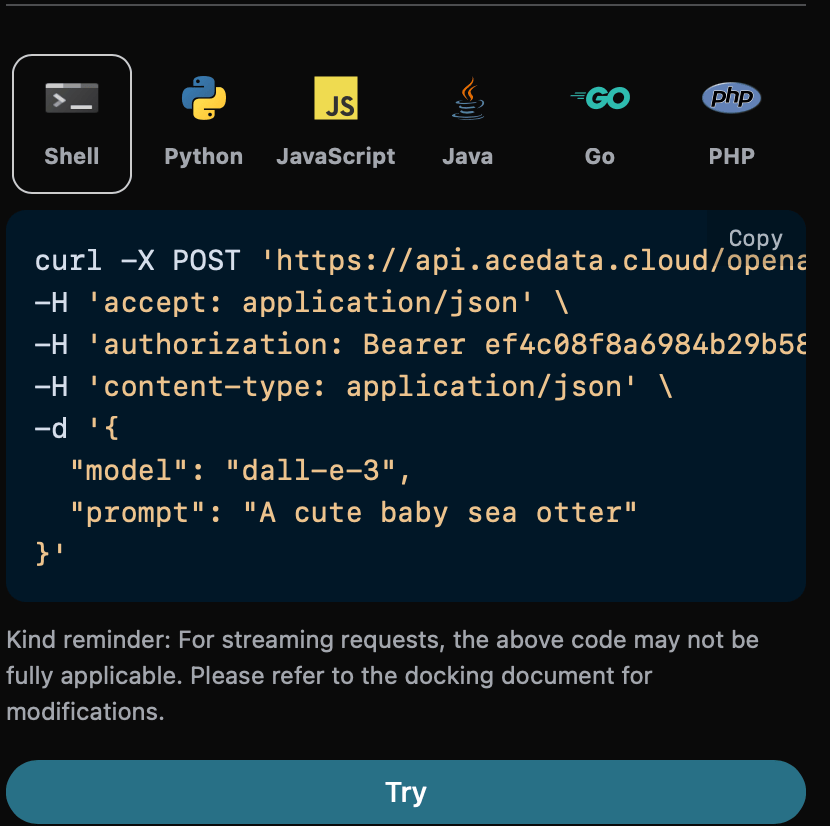
Python 샘플 호출 코드:
```python theme={null}
import requests
url = "https://api.acedata.cloud/openai/images/generations"
headers = {
"accept": "application/json",
"authorization": "Bearer {token}",
"content-type": "application/json"
}
payload = {
"model": "dall-e-3",
"prompt": "A cute baby sea otter"
}
response = requests.post(url, json=payload, headers=headers)
print(response.text)
```
호출 후 반환 결과 예시:
```json theme={null}
{
"created": 1721626477,
"data": [
{
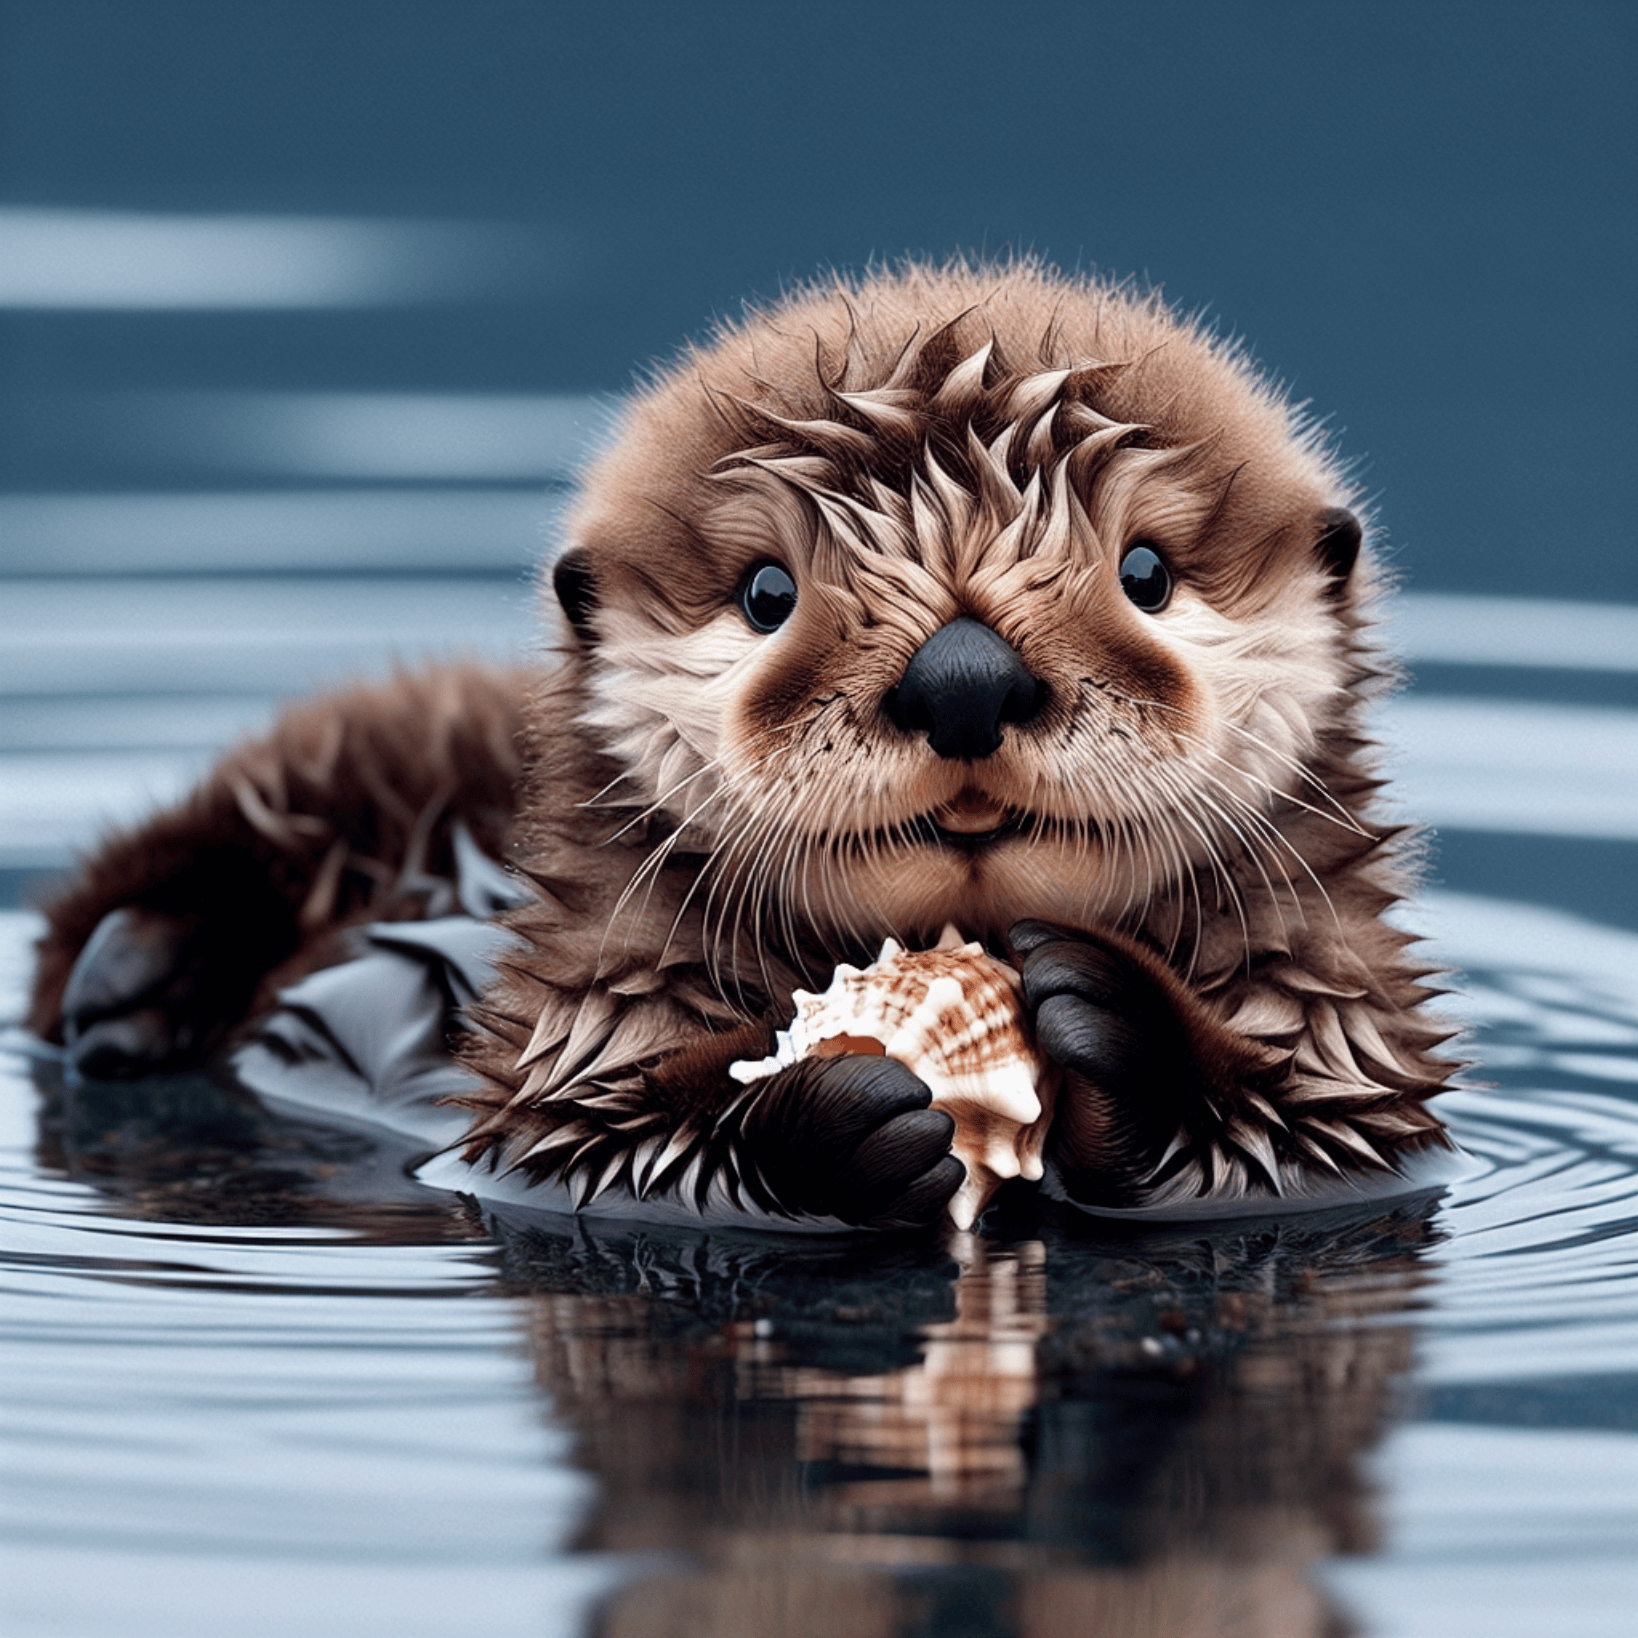
"revised_prompt": "A delightful image showcasing a young sea otter, who is born brown, with wide charming eyes. It is delightfully lying on its back, paddling in the calm sea waters. Its dense, velvety fur appears wet and shimmering, capturing the essence of its habitat. The small creature curiously plays with a sea shell with its small paws, looking absolutely innocent and charming in its natural environment.",
"url": "https://dalleprodsec.blob.core.windows.net/private/images/5d98aa7c-80c6-4523-b571-fc606ad455b9/generated_00.png?se=2024-07-23T05%3A34%3A48Z&sig=GAz%2Bi3%2BkHOQwAMhxcv22tBM%2FaexrxPgT9V0DbNrL4ik%3D&ske=2024-07-23T08%3A41%3A10Z&skoid=e52d5ed7-0657-4f62-bc12-7e5dbb260a96&sks=b&skt=2024-07-16T08%3A41%3A10Z&sktid=33e01921-4d64-4f8c-a055-5bdaffd5e33d&skv=2020-10-02&sp=r&spr=https&sr=b&sv=2020-10-02"
}
]
}
```
반환 결과에는 여러 필드가 포함되며, 주요 내용은 다음과 같습니다:
* `created`: 이번 이미지 생성 작업의 ID로, 작업을 고유하게 식별합니다.
* `data`: 이미지 생성 결과 정보가 포함되어 있습니다.
`data` 내부에는 모델이 생성한 이미지 정보가 포함되며, `url`은 생성된 이미지 상세 링크입니다. 아래 그림에서 확인할 수 있습니다.
## 이미지 품질 파라미터 `quality`
다음으로 이미지 생성 결과의 상세 파라미터 설정 방법을 소개합니다. 이미지 품질 파라미터 `quality`는 두 가지가 있습니다. 첫 번째 `standard`는 표준 이미지 생성, 두 번째 `hd`는 더 정교한 디테일과 높은 일관성을 가진 이미지를 생성합니다.
아래는 이미지 품질 파라미터를 `standard`로 설정한 예시입니다:
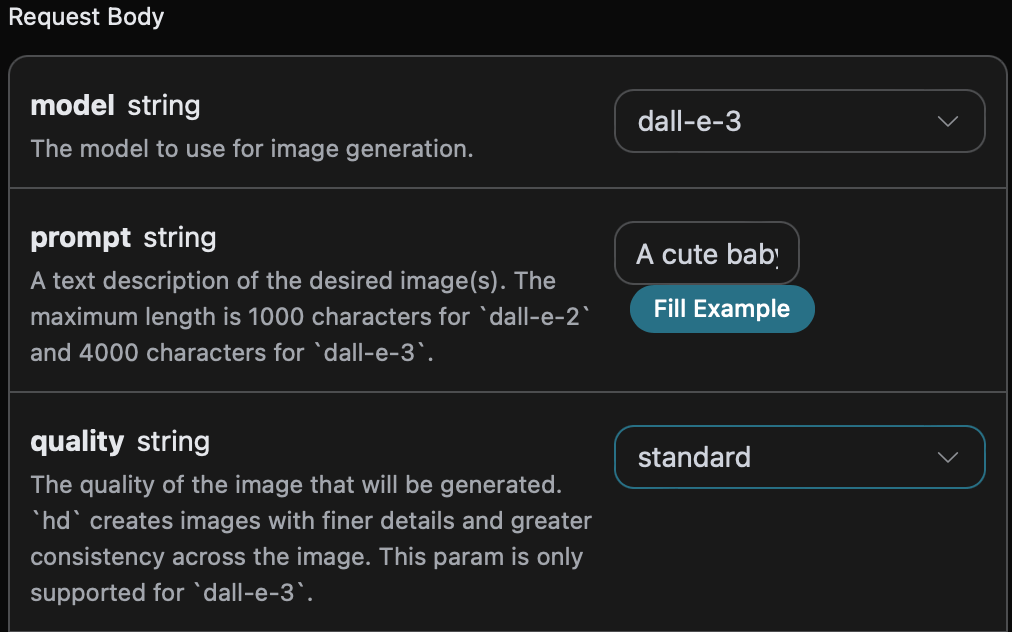
오른쪽에는 호출 코드가 생성되어 있어 복사해 바로 실행하거나 「Try」 버튼으로 테스트할 수 있습니다.
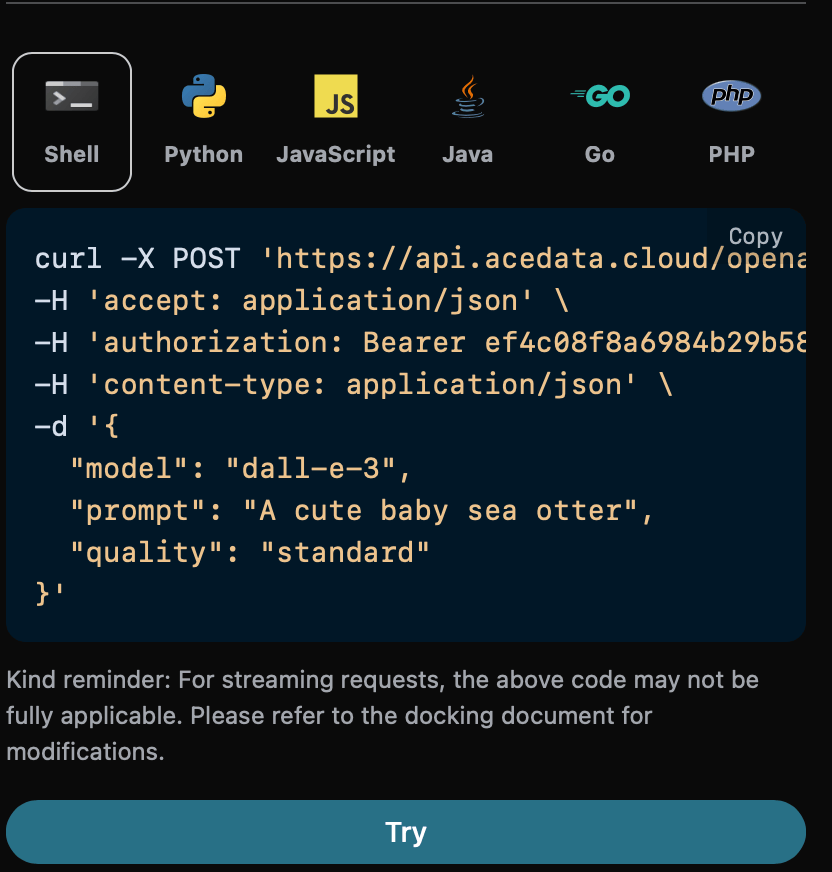
Python 샘플 호출 코드:
```python theme={null}
import requests
url = "https://api.acedata.cloud/openai/images/generations"
headers = {
"accept": "application/json",
"authorization": "Bearer {token}",
"content-type": "application/json"
}
payload = {
"model": "dall-e-3",
"prompt": "A cute baby sea otter",
"quality": "standard"
}
response = requests.post(url, json=payload, headers=headers)
print(response.text)
```
호출 후 반환 결과 예시:
```json theme={null}
{
"created": 1721636023,
"data": [
{
"revised_prompt": "A cute baby sea otter is lying playfully on its back in the water, with its fur looking glossy and soft. One of its tiny paws is reaching out curiously, and it has an expression of pure joy and warmth on its face as it looks up to the sky. Its body is surrounded by bubbles from its playful twirling in the water. A gentle breeze is playing with its fur making it look more charming. The scene portrays the tranquility and charm of marine life.",
"url": "https://dalleprodsec.blob.core.windows.net/private/images/a93ee5e7-3abd-4923-8d79-dc9ef126da46/generated_00.png?se=2024-07-23T08%3A13%3A55Z&sig=wTXGYvUOwUIkaB2CxjK9ww%2FHjS8OwYUWcYInXYKwcAM%3D&ske=2024-07-23T11%3A32%3A05Z&skoid=e52d5ed7-0657-4f62-bc12-7e5dbb260a96&sks=b&skt=2024-07-16T11%3A32%3A05Z&sktid=33e01921-4d64-4f8c-a055-5bdaffd5e33d&skv=2020-10-02&sp=r&spr=https&sr=b&sv=2020-10-02"
}
]
}
```
반환 결과는 기본 사용법과 유사하며, `quality`가 `standard`인 이미지 생성 결과는 아래와 같습니다:

동일한 조작에서 이미지 품질 파라미터를 `hd`로 설정하면 다음과 같은 이미지가 생성됩니다:

`hd`가 `standard`보다 더 정교한 디테일과 높은 일관성을 가진 이미지를 생성함을 확인할 수 있습니다.
## 이미지 크기 파라미터 `size`
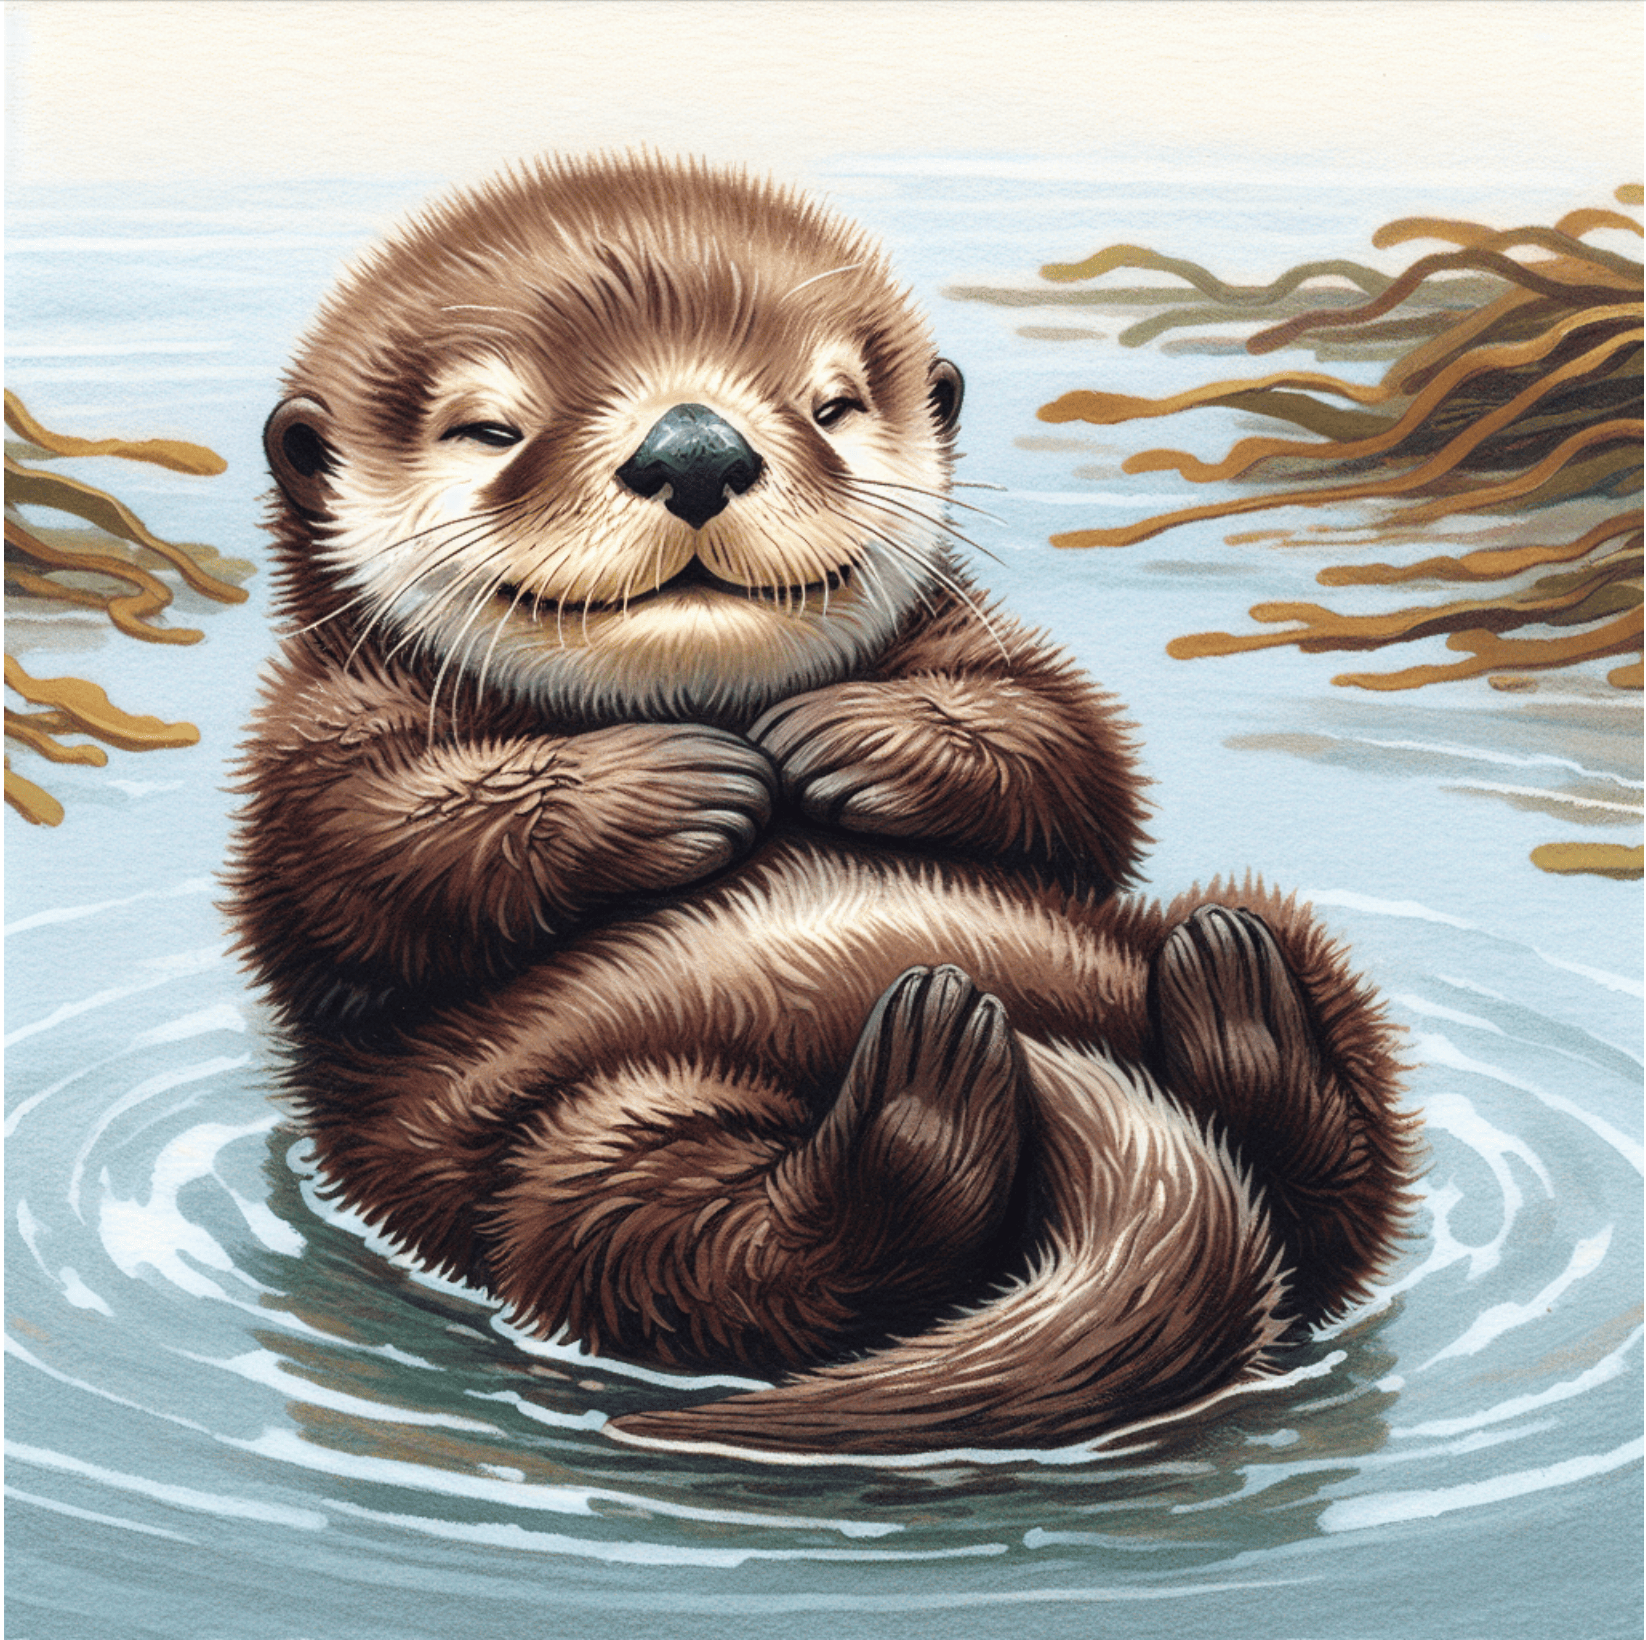
이미지 생성 시 크기를 설정할 수도 있습니다. 아래는 이미지 크기를 `1024 * 1024`로 설정한 예시입니다:
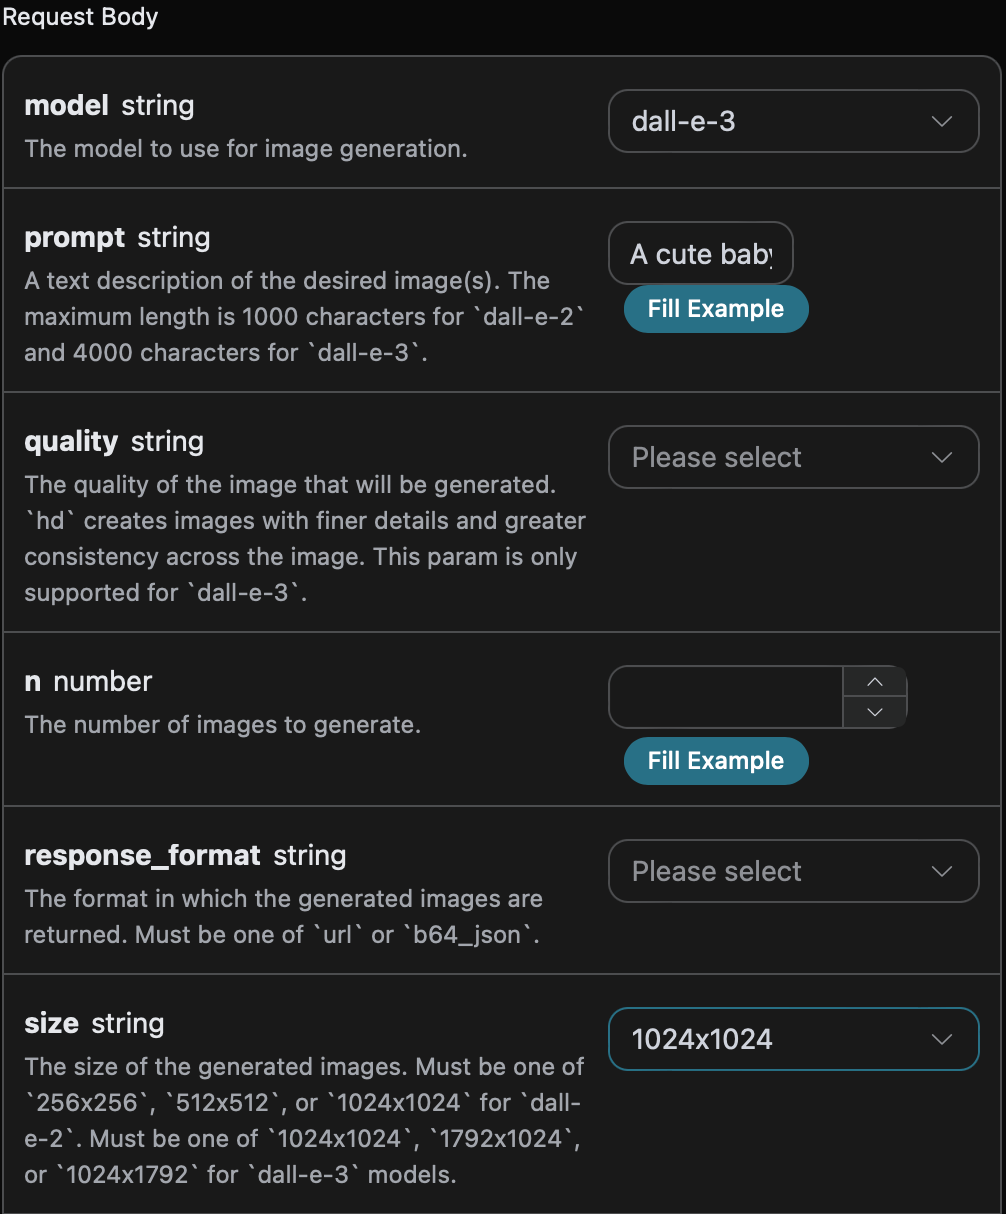
오른쪽에는 호출 코드가 생성되어 있어 복사해 바로 실행하거나 「Try」 버튼으로 테스트할 수 있습니다.
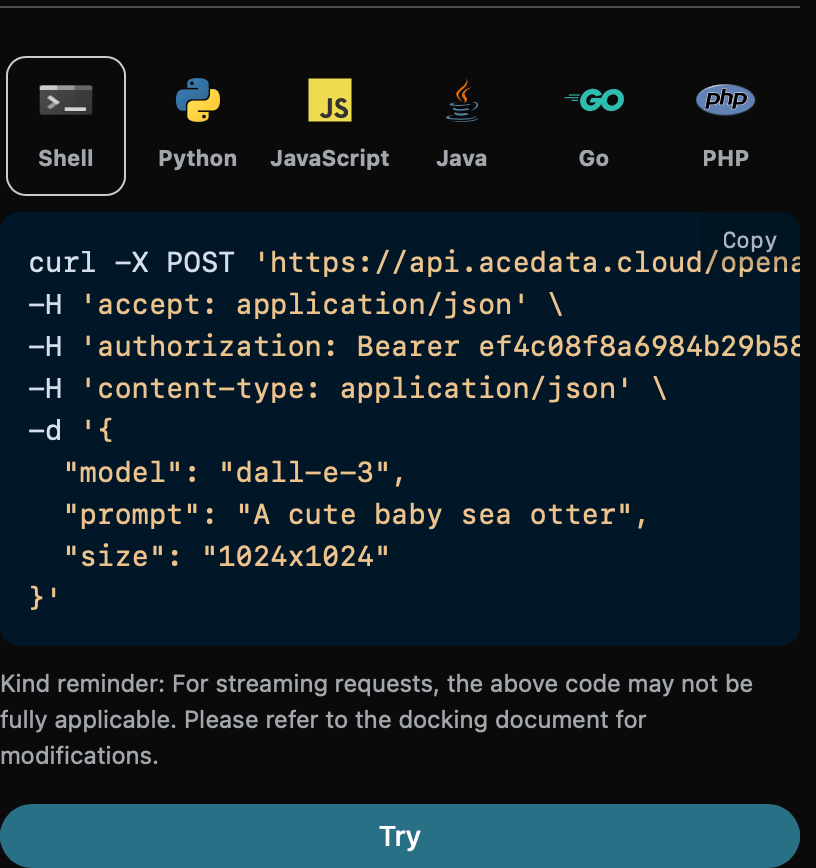
Python 샘플 호출 코드:
```python theme={null}
import requests
url = "https://api.acedata.cloud/openai/images/generations"
headers = {
"accept": "application/json",
"authorization": "Bearer {token}",
"content-type": "application/json"
}
payload = {
"model": "dall-e-3",
"prompt": "A cute baby sea otter",
"size": "1024x1024"
}
response = requests.post(url, json=payload, headers=headers)
print(response.text)
```
호출 후 반환 결과 예시:
```json theme={null}
{
"created": 1721636652,
"data": [
{
"revised_prompt": "A delightful depiction of a baby sea otter. The small mammal is captured in its natural habitat in the ocean, floating on its back. It has thick brown fur that is sleek and wet from the sea water. Its eyes are closed as if it is enjoying a moment of deep relaxation. The water around it is calm, reflecting the peacefulness of the scene. The background should hint at a diverse marine ecosystem, with visible strands of kelp floating on the surface, suggesting the baby otter's preferred environment.",
"url": "https://dalleprodsec.blob.core.windows.net/private/images/9d625ac6-fd2b-42a9-84a6-8c99eb357ccf/generated_00.png?se=2024-07-23T08%3A24%3A24Z&sig=AXtYXowEakGxfRp8LhC2DwqL%2F07LhEDW40oCP%2BdTO8s%3D&ske=2024-07-23T18%3A00%3A45Z&skoid=e52d5ed7-0657-4f62-bc12-7e5dbb260a96&sks=b&skt=2024-07-16T18%3A00%3A45Z&sktid=33e01921-4d64-4f8c-a055-5bdaffd5e33d&skv=2020-10-02&sp=r&spr=https&sr=b&sv=2020-10-02"
}
]
}
```
반환 결과는 기본 사용법과 유사하며, 크기가 `1024 * 1024`인 이미지 생성 결과는 아래와 같습니다:
동일한 조작에서 크기를 `1792 * 1024`로 설정하면 다음과 같은 이미지가 생성됩니다:
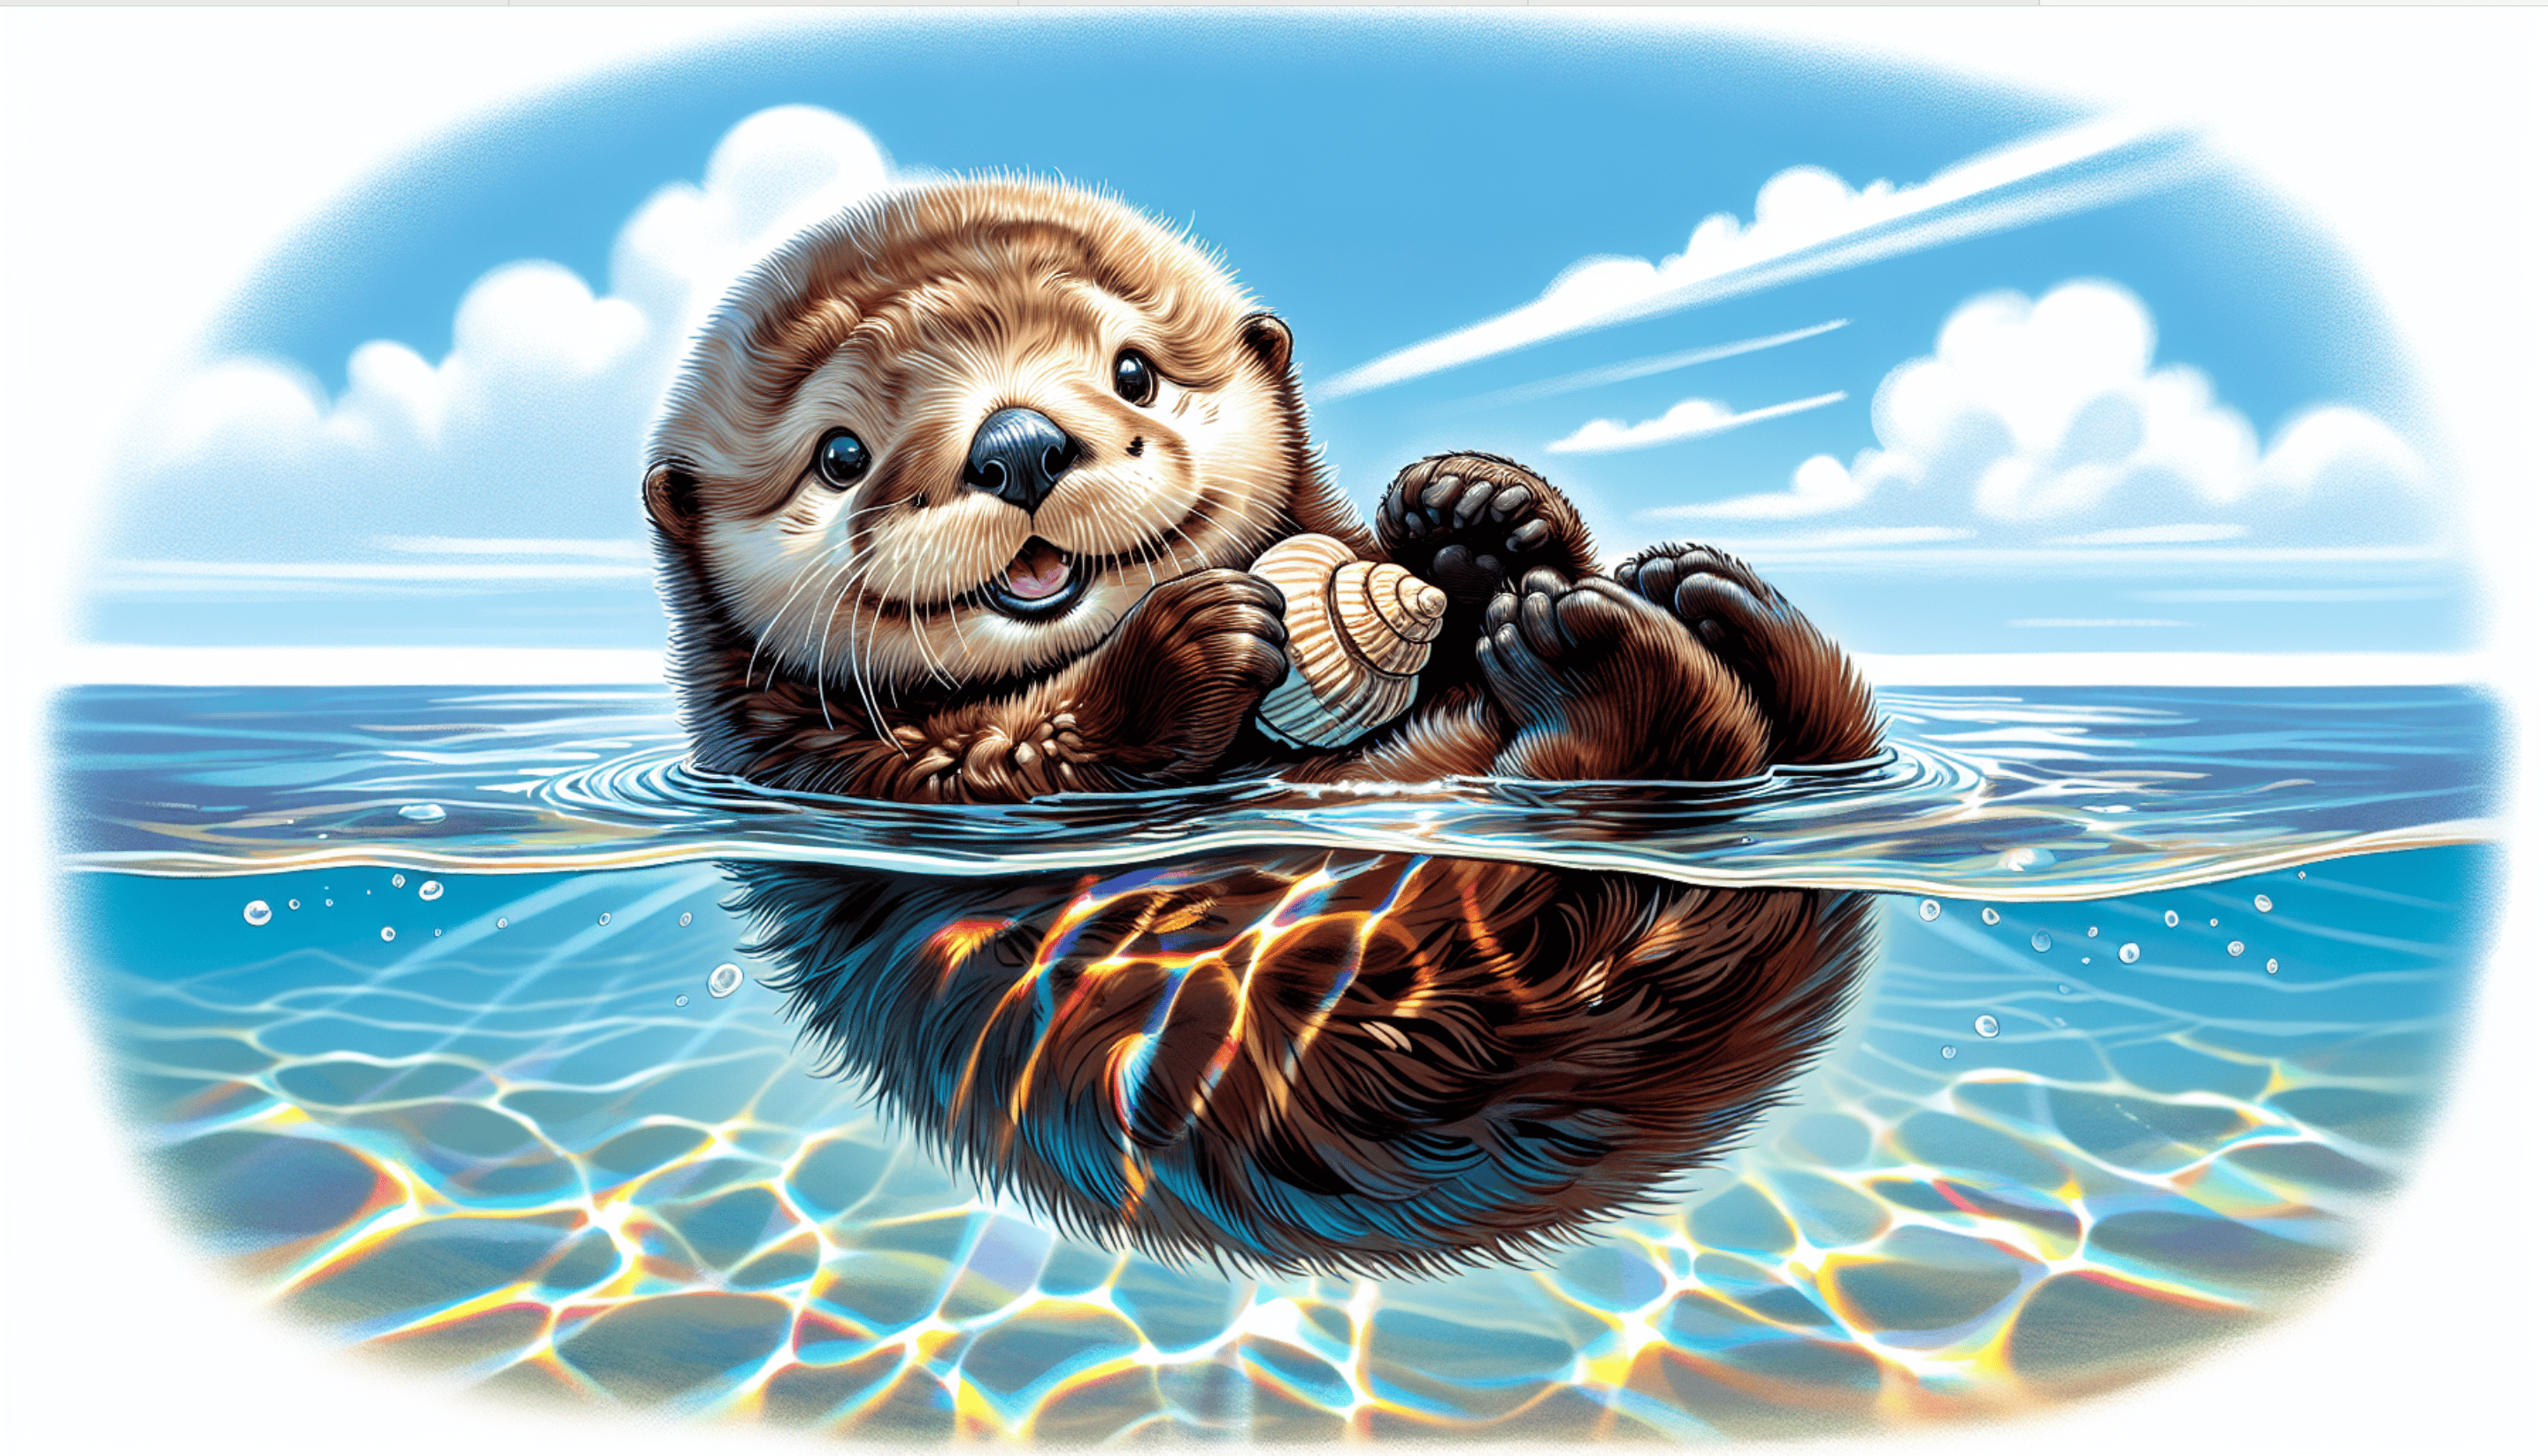
이미지 크기가 명확히 다름을 확인할 수 있으며, 더 많은 크기 설정은 공식 문서를 참고하세요.
## 이미지 스타일 파라미터 `style`
이미지 스타일 파라미터 `style`은 두 가지가 있습니다. 첫 번째 `vivid`는 더욱 생생한 이미지를 생성하며, 두 번째 `natural`은 보다 자연스러운 이미지를 생성합니다.
아래는 이미지 스타일 파라미터를 `vivid`로 설정한 예시입니다:
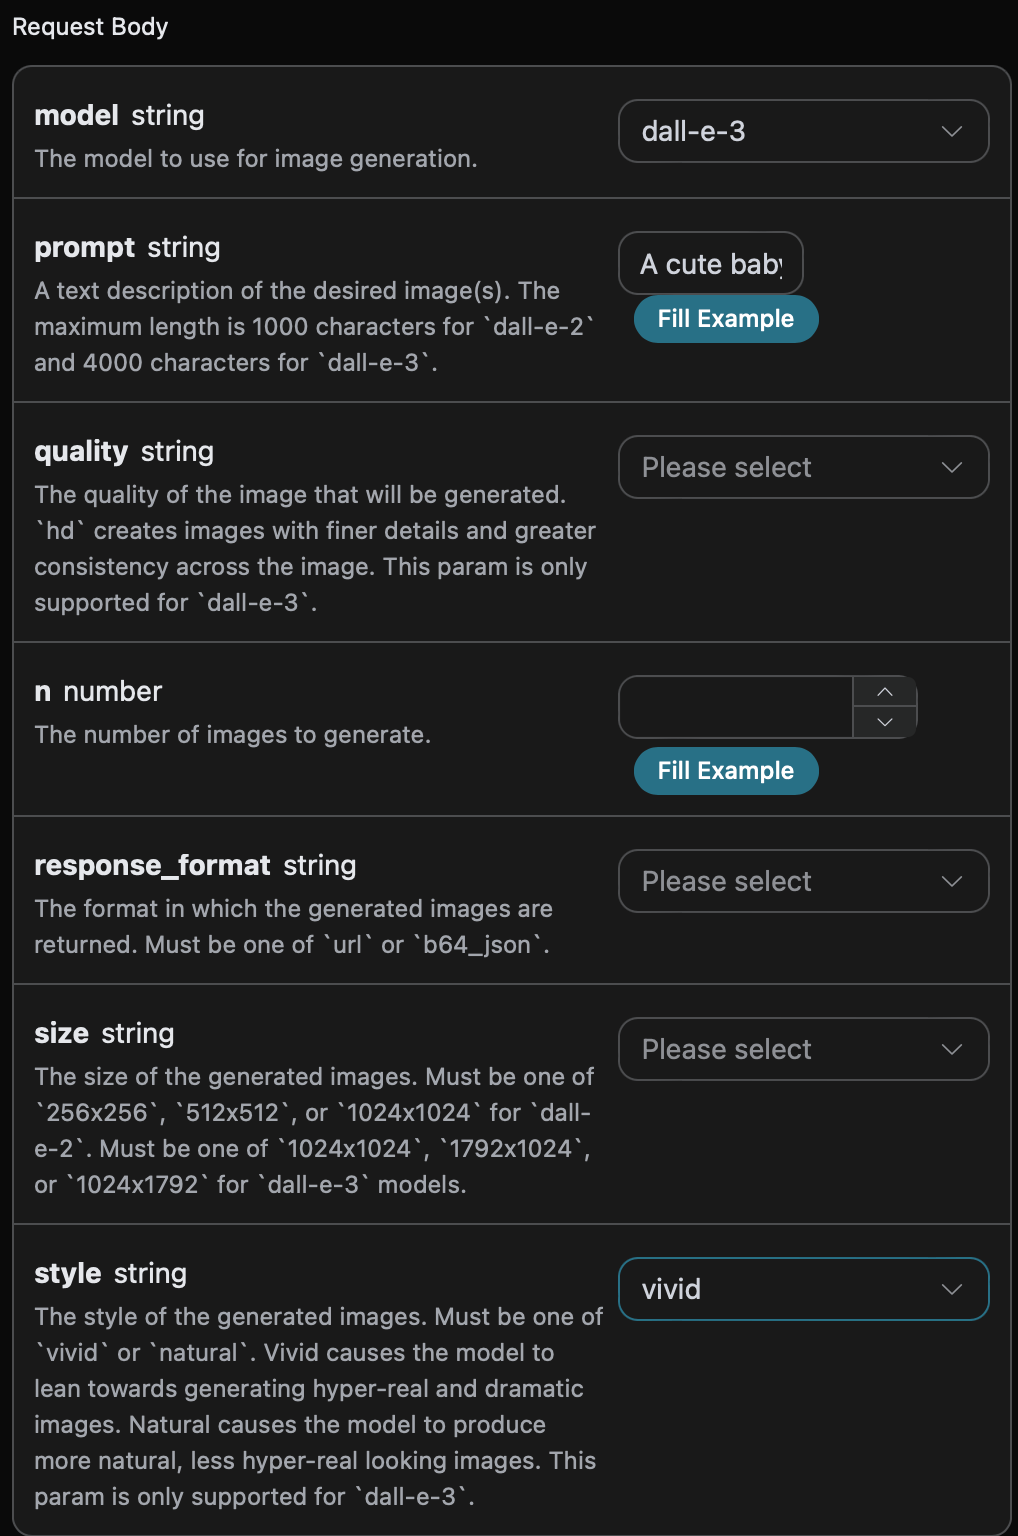
오른쪽에는 호출 코드가 생성되어 있어 복사해 바로 실행하거나 「Try」 버튼으로 테스트할 수 있습니다.
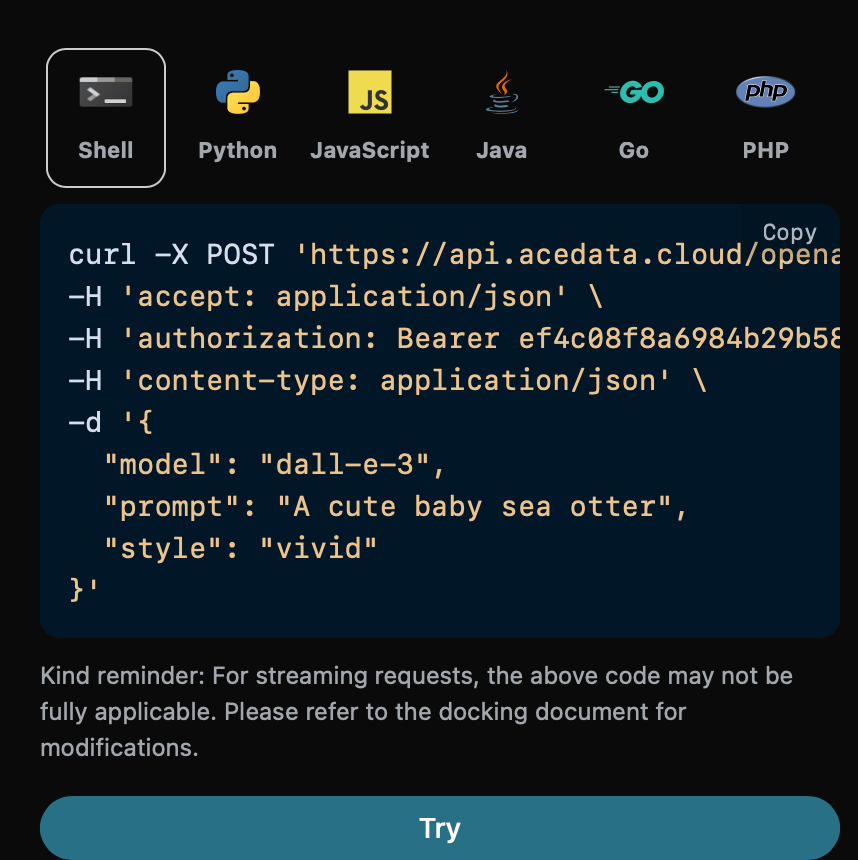
Python 샘플 호출 코드:
```python theme={null}
import requests
url = "https://api.acedata.cloud/openai/images/generations"
headers = {
"accept": "application/json",
"authorization": "Bearer {token}",
"content-type": "application/json"
}
payload = {
"model": "dall-e-3",
"prompt": "A cute baby sea otter",
"style": "vivid"
}
response = requests.post(url, json=payload, headers=headers)
print(response.text)
```
호출 후 반환 결과 예시:
```json theme={null}
{
"created": 1721637086,
"data": [
{
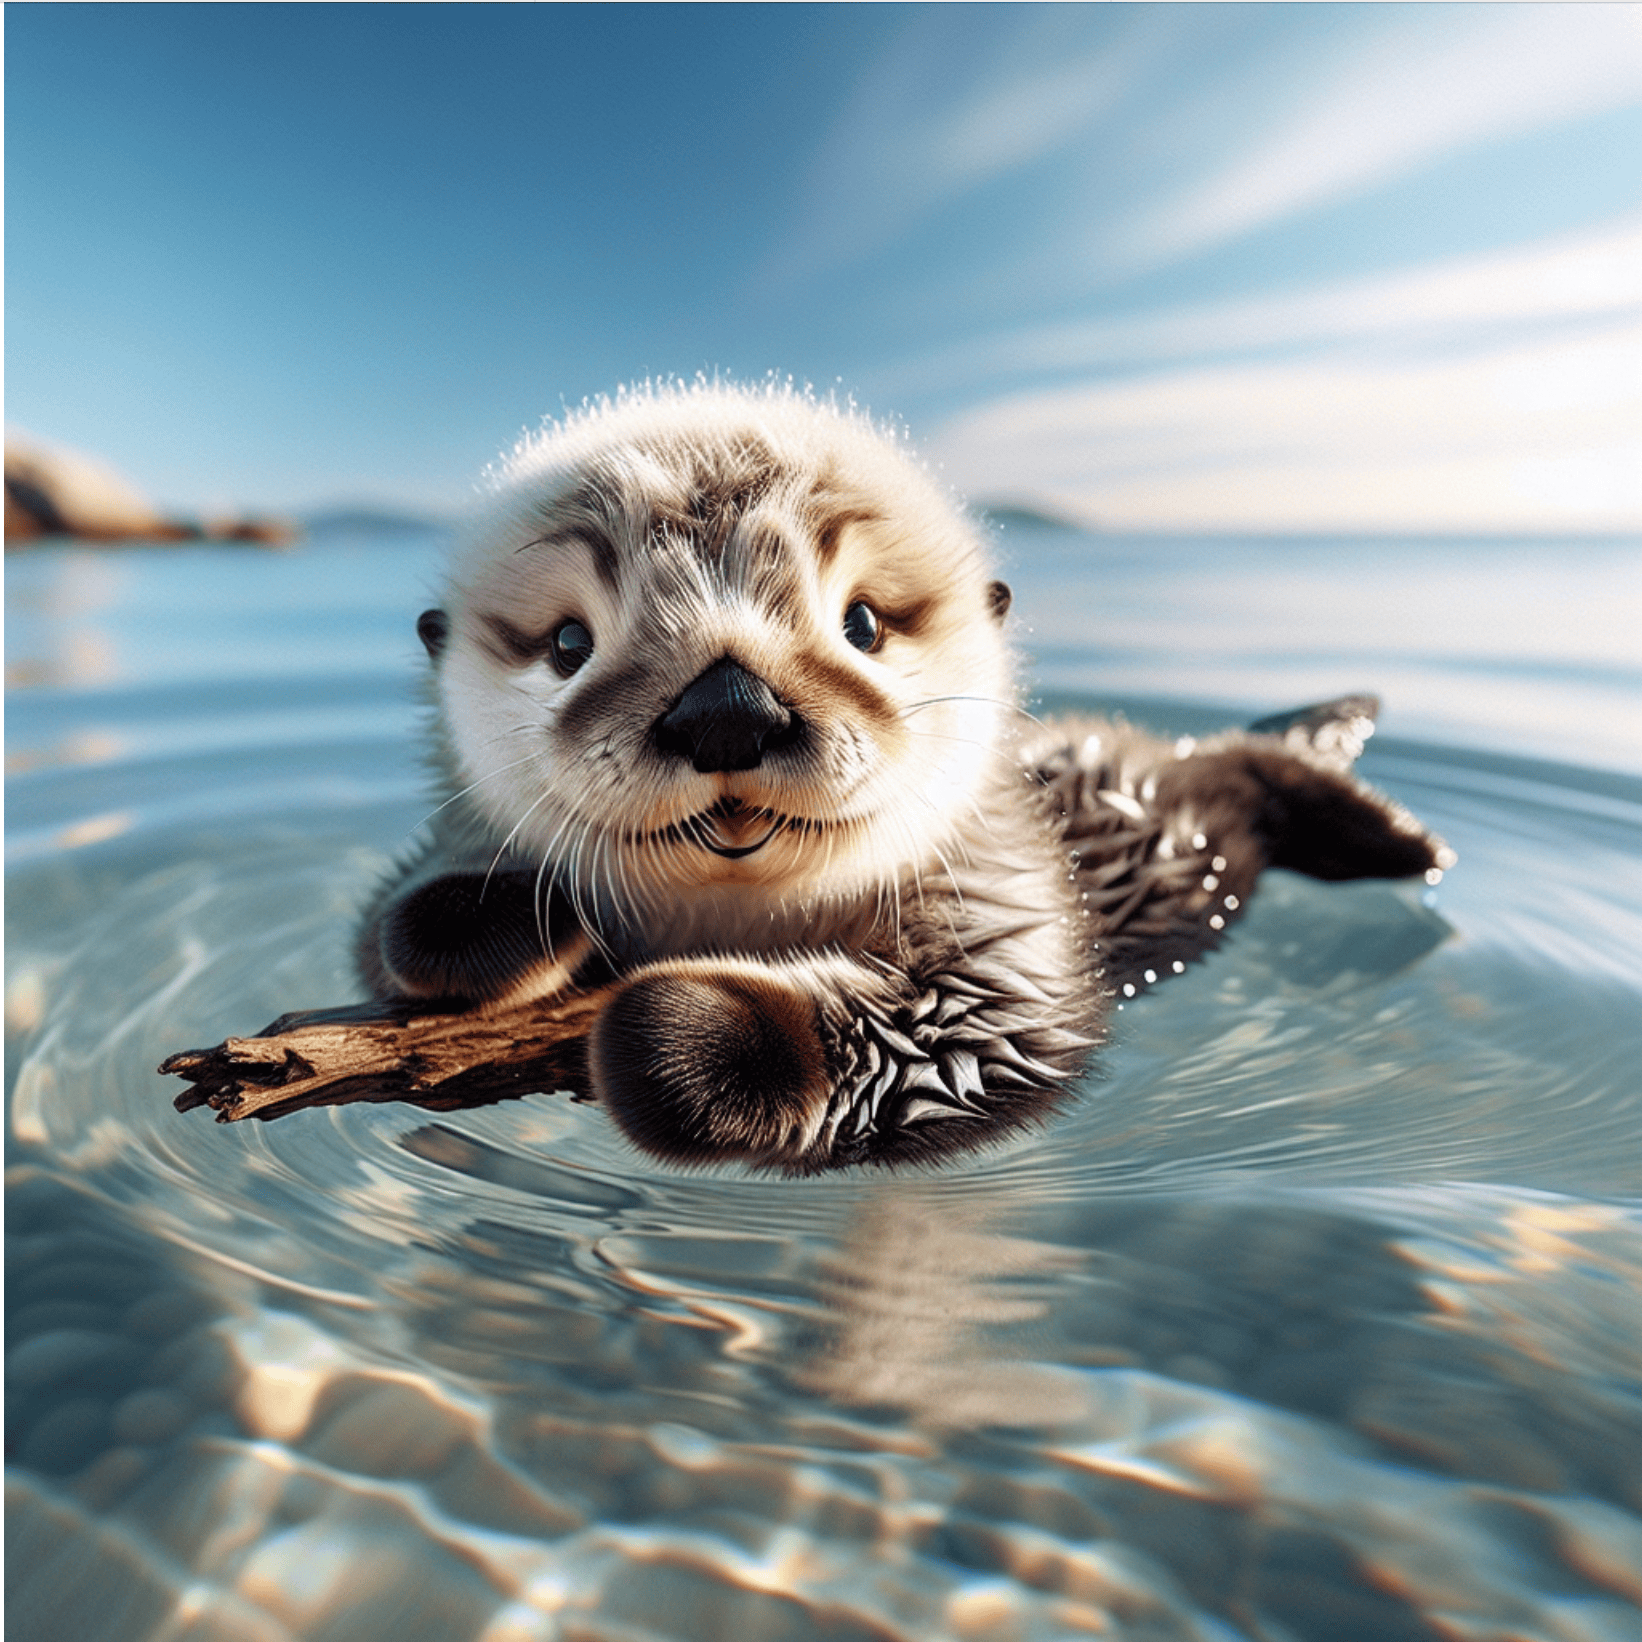
"revised_prompt": "A baby sea otter with soft, shiny fur and sparkling eyes floating playfully on calm ocean waters. This adorable creature is trippingly frolicking amidst small, gentle waves under a bright, clear, sunny sky. The tranquility of the sea contrasts subtly with the delightful energy of this young otter. The critter gamely clings to a tiny piece of driftwood, its small paws adorably enveloping the floating object.",
"url": "https://dalleprodsec.blob.core.windows.net/private/images/6e48f701-7fd3-4356-839e-a2f6f0fe82d9/generated_00.png?se=2024-07-23T08%3A31%3A37Z&sig=4percxqTbUR1j3BQmkhvj%2FAhHzInKI%2FqiTo1MP69coI%3D&ske=2024-07-27T10%3A39%3A55Z&skoid=e52d5ed7-0657-4f62-bc12-7e5dbb260a96&sks=b&skt=2024-07-20T10%3A39%3A55Z&sktid=33e01921-4d64-4f8c-a055-5bdaffd5e33d&skv=2020-10-02&sp=r&spr=https&sr=b&sv=2020-10-02"
}
]
}
```
반환 결과는 기본 사용법과 유사하며, `style`이 `vivid`인 이미지 생성 결과는 아래와 같습니다:
동일한 조작에서 `style`을 `natural`로 설정하면 다음과 같은 이미지가 생성됩니다:
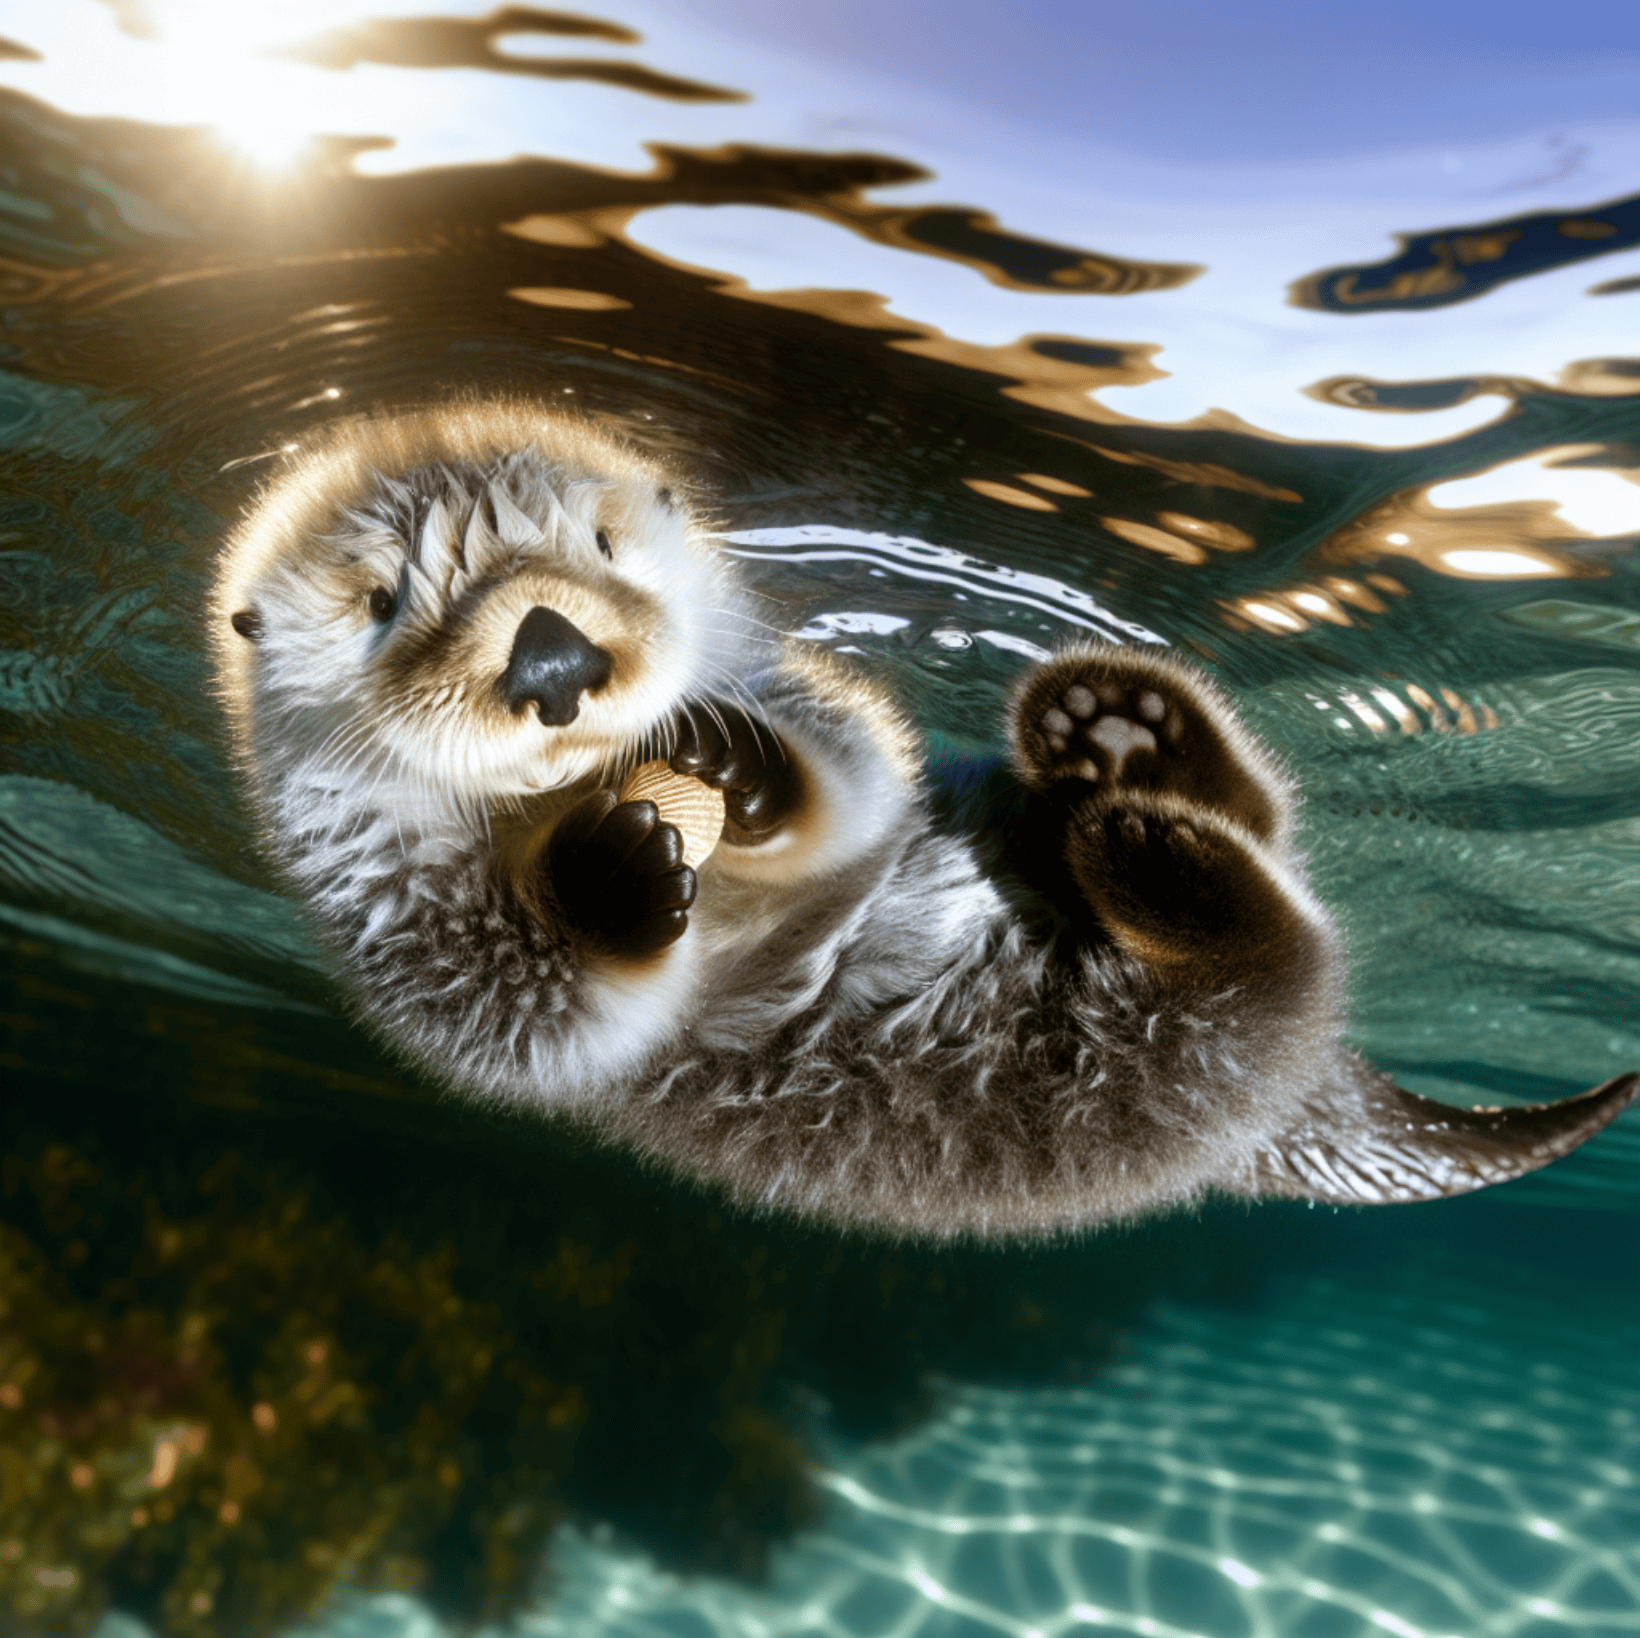
`vivid`가 `natural`보다 더 생동감 있고 사실적인 이미지를 생성함을 확인할 수 있습니다.
## 이미지 링크 형식 파라미터 `response_format`
마지막으로 이미지 링크 형식 파라미터 `response_format`은 두 가지가 있습니다. 첫 번째 `b64_json`은 이미지 링크를 Base64 인코딩한 것이며, 두 번째 `url`은 일반 이미지 링크로 직접 이미지를 확인할 수 있습니다.
아래는 이미지 링크 형식을 `url`로 설정한 예시입니다:
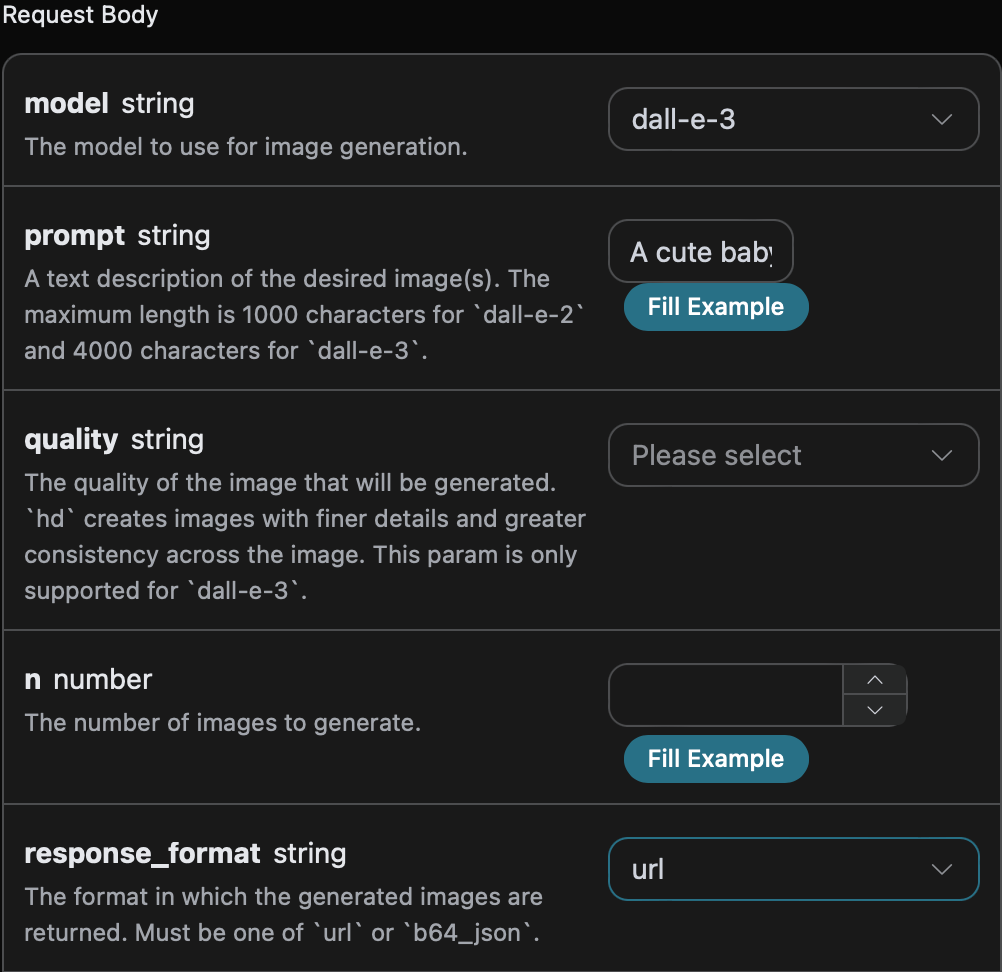
오른쪽에는 호출 코드가 생성되어 있어 복사해 바로 실행하거나 「Try」 버튼으로 테스트할 수 있습니다.
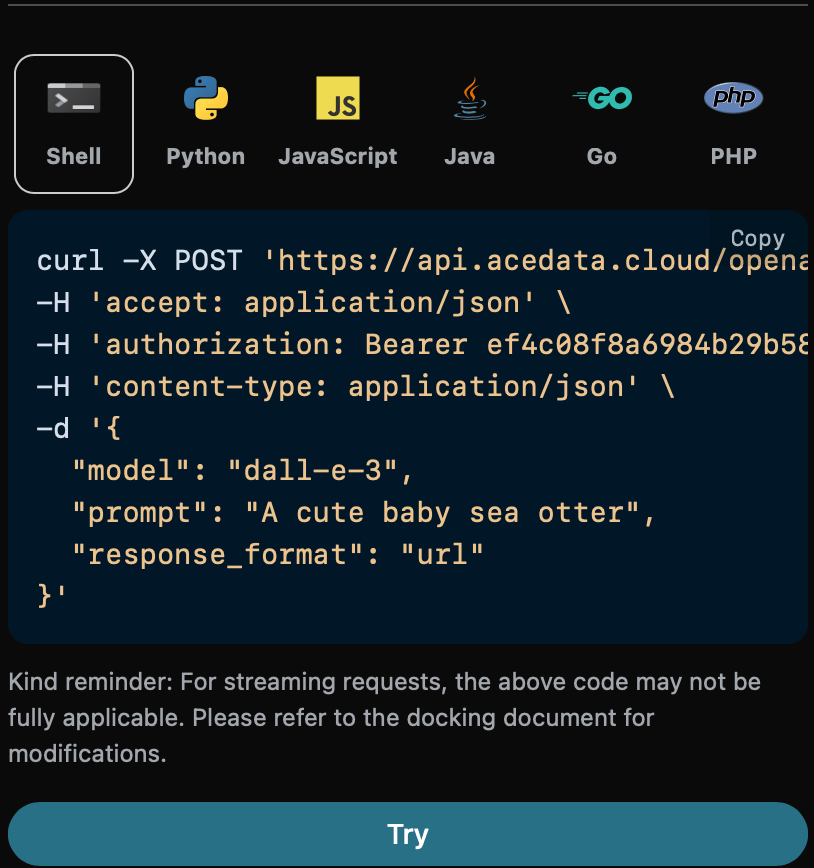
Python 샘플 호출 코드:
```python theme={null}
import requests
url = "https://api.acedata.cloud/openai/images/generations"
headers = {
"accept": "application/json",
"authorization": "Bearer {token}",
"content-type": "application/json"
}
payload = {
"model": "dall-e-3",
"prompt": "A cute baby sea otter",
"response_format": "url"
}
response = requests.post(url, json=payload, headers=headers)
print(response.text)
```
호출 후 반환 결과 예시:
```json theme={null}
{
"created": 1721637575,
"data": [
{
"revised_prompt": "A charming depiction of a baby sea otter. The otter is seen resting serenely on its back amidst the gentle, blue ocean waves. The baby otter's fur is an endearing mix of soft greyish brown shades, glinting subtly in the muted sunlight. Its small paws are touching, lifted slightly towards the sky as if playing with an unseen object. Its round, expressive eyes are wide in curiosity, sparking with life and innocence. Use a realistic style to evoke the otter's natural habitat and its adorably fluffy exterior.",
"url": "https://dalleprodsec.blob.core.windows.net/private/images/87792c5f-8b6d-412e-81dd-f1a1baa19bd2/generated_00.png?se=2024-07-23T08%3A39%3A47Z&sig=zzRAn30TqIKHdLVqZPUUuSJdjCYpoJdaGU6BeoA76Jo%3D&ske=2024-07-23T13%3A32%3A13Z&skoid=e52d5ed7-0657-4f62-bc12-7e5dbb260a96&sks=b&skt=2024-07-16T13%3A32%3A13Z&sktid=33e01921-4d64-4f8c-a055-5bdaffd5e33d&skv=2020-10-02&sp=r&spr=https&sr=b&sv=2020-10-02"
}
]
}
```
반환 결과는 기본 사용법과 유사하며, `response_format`이 `url`인 이미지 링크는 [이미지 URL](https://dalleprodsec.blob.core.windows.net/private/images/87792c5f-8b6d-412e-81dd-f1a1baa19bd2/generated_00.png?se=2024-07-23T08%3A39%3A47Z\&sig=zzRAn30TqIKHdLVqZPUUuSJdjCYpoJdaGU6BeoA76Jo%3D\&ske=2024-07-23T13%3A32%3A13Z\&skoid=e52d5ed7-0657-4f62-bc12-7e5dbb260a96\&sks=b\&skt=2024-07-16T13%3A32%3A13Z\&sktid=33e01921-4d64-4f8c-a055-5bdaffd5e33d\&skv=2020-10-02\&sp=r\&spr=https\&sr=b\&sv=2020-10-02)로 직접 접근 가능하며, 이미지 내용은 아래와 같습니다:

동일한 조작에서 `response_format`을 `b64_json`으로 설정하면 Base64 인코딩된 이미지 링크를 얻을 수 있으며, 결과는 아래와 같습니다:
```json theme={null}
{
"created": 1721638071,
"data": [
{
"b64_json": "iVBORw0..............v//AQEAAP4AAAD+AAADAQAAAwEEA/4D//8Q/Pbw64mKbVTFoQAAAABJRU5ErkJggg==",
"revised_prompt": "A charming image of a young baby sea otter. The otter is gently floating on a calm blue sea, basking in the warm, golden rays of sunlight streaming down from a clear sky above. The otter's fur is a rich chocolate brown, and it looks incredibly soft and fluffy. The otter's eyes are bright and expressive, filled with childlike curiosity and joy. It has small, pricked ears and a button-like nose which adds to its overall cuteness. In the sea around it, twinkling droplets of water can be seen, pepped up by the sunlight, the sight is certainly a delightful one."
}
]
}
```
## 비동기 콜백
OpenAI Images Generations API는 이미지 생성에 시간이 다소 소요될 수 있으므로, API가 장시간 응답하지 않으면 HTTP 요청이 계속 연결 상태를 유지해 시스템 자원을 과도하게 소모할 수 있습니다. 이를 방지하기 위해 본 API는 비동기 콜백을 지원합니다.
전체 흐름은 다음과 같습니다: 클라이언트가 요청 시 `callback_url` 필드를 추가로 지정하면, API는 즉시 `task_id`를 포함한 응답을 반환합니다. 작업이 완료되면 생성된 이미지 결과를 JSON 형태로 클라이언트가 지정한 `callback_url`에 POST 방식으로 전송하며, 이때도 `task_id`가 포함되어 작업 결과를 ID로 연동할 수 있습니다.
아래 예시로 구체적인 사용법을 살펴보겠습니다.
먼저, Webhook 콜백은 HTTP 요청을 받을 수 있는 서비스여야 하며, 개발자는 자신이 구축한 HTTP 서버 URL로 교체해야 합니다. 여기서는 시연을 위해 공개 Webhook 사이트 [https://webhook.site/를](https://webhook.site/를) 사용합니다. 사이트를 열면 Webhook URL을 얻을 수 있습니다:
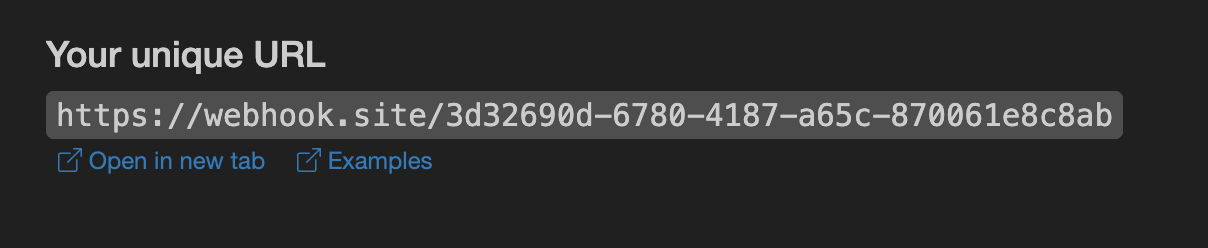
이 URL을 복사하여 Webhook으로 사용합니다. 예시 URL은 `https://webhook.site/3d32690d-6780-4187-a65c-870061e8c8ab`입니다.
다음으로 `callback_url` 필드를 위 Webhook URL로 설정하고, 아래와 같이 파라미터를 작성합니다:
```python theme={null}
import requests
url = "https://api.acedata.cloud/openai/images/generations"
headers = {
"accept": "application/json",
"authorization": "Bearer {token}",
"content-type": "application/json"
}
payload = {
"model": "dall-e-3",
"prompt": "A cute baby sea otter",
"callback_url": "https://webhook.site/3d32690d-6780-4187-a65c-870061e8c8ab"
}
response = requests.post(url, json=payload, headers=headers)
print(response.text)
```
실행하면 즉시 다음과 같은 결과를 받습니다:
```json theme={null}
{
"task_id": "6a97bf49-df50-4129-9e46-119aa9fca73c"
}
```
잠시 후 Webhook URL에서 이미지 생성 결과를 확인할 수 있습니다. 내용은 다음과 같습니다:
```json theme={null}
{
"success": true,
"task_id": "6a97bf49-df50-4129-9e46-119aa9fca73c",
"trace_id": "9b4b1ff3-90f2-470f-b082-1061ec2948cc",
"data": {
"created": 1721626477,
"data": [
{
"revised_prompt": "A delightful image showcasing a young sea otter...",
"url": "https://dalleprodsec.blob.core.windows.net/private/images/..."
}
]
}
}
```
결과에 `task_id` 필드가 포함되어 있고, `data` 필드에는 동기 호출과 동일한 이미지 생성 결과가 포함되어 있습니다. `task_id`를 통해 작업을 연동할 수 있습니다.
## 오류 처리
API 호출 시 오류가 발생하면, API는 관련 오류 코드와 메시지를 반환합니다. 예시는 다음과 같습니다:
* `400 token_mismatched`: 잘못된 요청, 파라미터 누락 또는 유효하지 않음.
* `400 api_not_implemented`: 잘못된 요청, 파라미터 누락 또는 유효하지 않음.
* `401 invalid_token`: 인증 실패, 토큰이 없거나 유효하지 않음.
* `429 too_many_requests`: 요청 과다, 속도 제한 초과.
* `500 api_error`: 서버 내부 오류.
### 오류 응답 예시
```json theme={null}
{
"success": false,
"error": {
"code": "api_error",
"message": "fetch failed"
},
"trace_id": "2cf86e86-22a4-46e1-ac2f-032c0f2a4e89"
}
```
## 결론
이 문서를 통해 OpenAI Images Generations API를 사용하여 공식 OpenAI DALL-E의 이미지 생성 기능을 쉽게 활용하는 방법을 익혔습니다. 본 문서가 API 연동 및 사용에 도움이 되길 바라며, 문의 사항이 있으면 언제든지 기술 지원팀에 연락해 주시기 바랍니다.